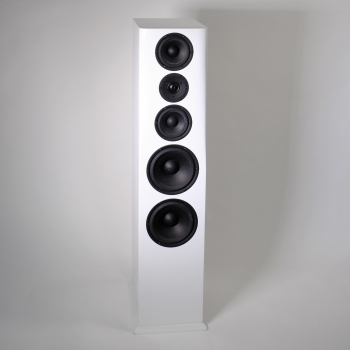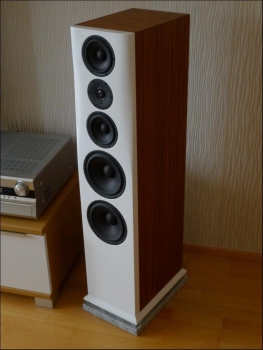


Satorique 4 Loudspeaker
The Satorique S4 prefers and neglects no frequency range. It masters its balance in all tonal ranges with a nonchalance that is only known from live concerts. Playing through individual musical directions with single disciplines in the various rock jazz blues classes could be saved. Tonally balanced in all positions. The perfect partner for demanding high-end stereo applications. CNC cabinet cut available. Please specify when ordering if you want the tweeter with black ring or silver ring. Read Satorique 4 review.Curious now ?
Read the complete report in the next chapter tab.
Satorique 4 Loudspeaker
Foreword
What moved us to release the Satorique 4 into the audiophile world before the Satorique 3 is simply because the playing partners for the eagerly awaited Satorique 3 have not yet been available. So we'll skip this one for now, and the Satorique 4 model will follow.
Thus, the Satorique 3 - when the time comes - will certainly have its due appearance in the listening room at a later date.

The technology: with two new drivers at once
Two new loudspeaker drivers are used in the Satorique 4.
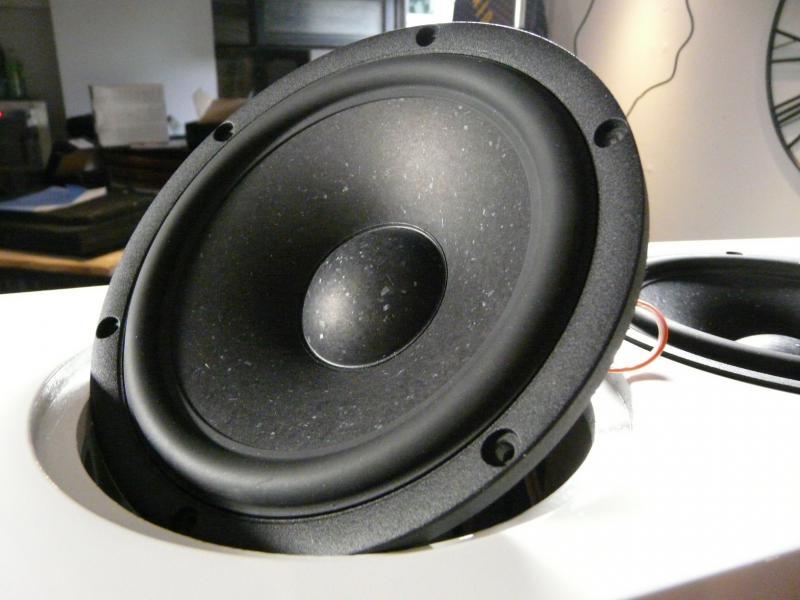

The 7.5" MW19P chassis has Thiele-Small parameters comparable to its smaller brother in terms of overall Qts and Vas. Coupled with a 3 Hz higher resonant frequency, it quickly becomes clear that no big boost in low-frequency response is to be expected. However, with a combined net volume of over 40 liters, the 35 Hz limit is easily reached. The advantage is the larger diaphragm area and the slightly larger excursion, which ultimately leads to a perceptibly higher sound pressure. All in all, this woofer is an excellent choice for a three-way design.
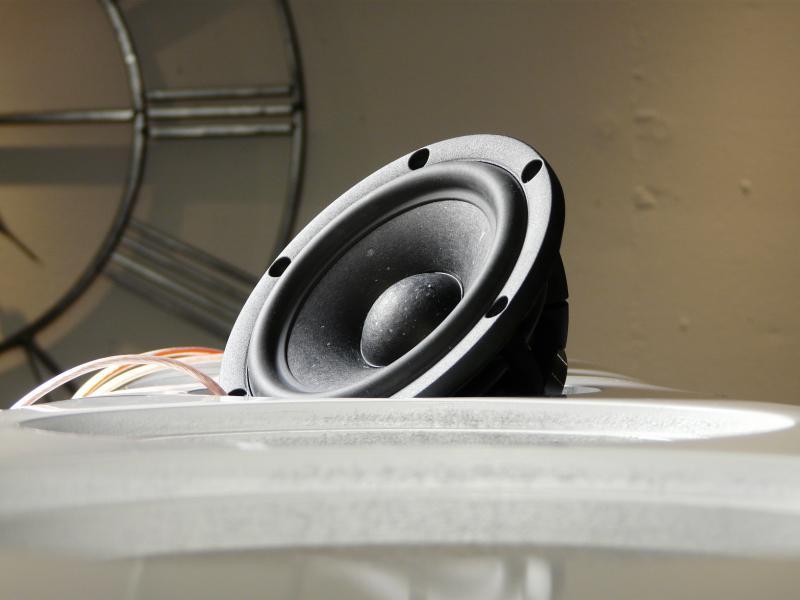

In the midrange, two 5" MW13P drivers are used in a common, closed 8 liter cabinet. Actually, we didn't want to shoot all our powder at once and use the proven tweeter TW29R - known from the Satorique 1 - in the high frequency range. However, the level of over 93 dB in the bass-midrange put a spoke in our wheel. So we decided without further ado to use the new TW29RN, which is the required 4 dB louder thanks to its more powerful drive.

Milling depths:
Mid-bass:7.5 mm
Tweeter: 5 mm

A three-way design is much more complex and time-consuming to tune than a two-way speaker! Three loudspeakers with mostly different levels must be brought to the same level and especially with parallel-connected chassis, the ohmic load must also be kept in mind. To make matters worse, a vertical arrangement of the drivers (especially in a D'Apollito arrangement) is accompanied by stronger directivity in the vertical and the measuring distance should be at least 2 meters. Without an anechoic chamber for low frequencies a difficult undertaking. For this reason, the bass frequencies (except for near-field measurements) always appear with a certain ripple caused by floor reflections.
The cross over:
In the low frequency branch a 2nd order filter is sufficient. In order to achieve this really cleanly, it is necessary to smooth the upper impedance bump by means of an R-C-L link. Otherwise the bass would become too powerful.
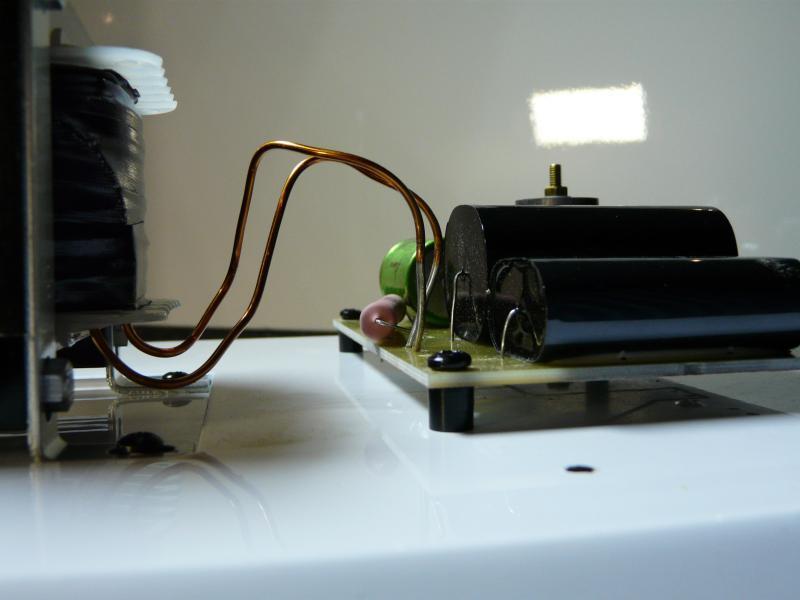
We gave the green light to the use of a heavy-duty transformer core coil over a roller core coil because of the low distortion and equally low internal resistance. The 7.5" jewels thank us with dryness and precise imaging up to considerable volumes. The bass reproduction always remains controlled.
The high pass filter for the two midrange drivers is a bit special: A common 2nd order filter would strongly boost the midrange, which we definitely don't need. A 1st order filter prevents this, but only gives the desired slope of 12 dB in conjunction with an R-C-L element. Although a series-wired series resistor would also help the problem, it is not a very promising solution sonically. The filtering between midrange and treble is done in the well-tried manner. The impedance curve is within a 2 Ohm range, which makes a correction for tube amplifiers unnecessary.


The housing: 5 parties in one house
In order to enable people to get started with self-build loudspeakers, who do not want to tackle such a project due to time constraints or their tool equipment, we offer a high-quality cabinet kit. The complete body is made of 19mm MDF raw. The 3D baffle is made of 30mm MDF. Optionally, the body can be made with 19mm MDF primer white, 19mm MDF black or 18mm birch multiplex (extra charge).
For private reproduction here is the detailed drawing :

In the following we show the assembly with the housing kit.
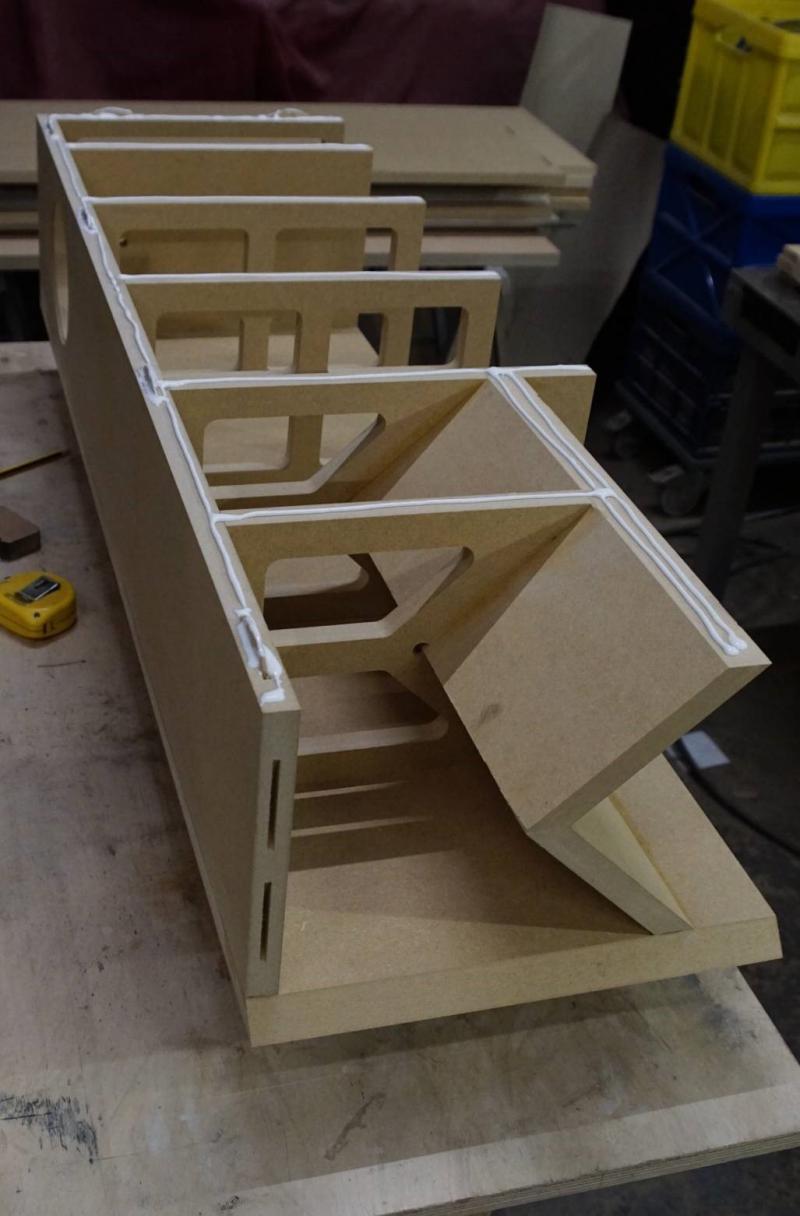
Here very nice to see the separate chambers with the CNC milled struts. When building the cabinet, please make sure that the cutouts of the inner bracing are large enough, otherwise you will get a mismatched double chamber bass.

Carefully wet the edges with joint glue and insert the lamellos. Tighten everything with tension belts or screw clamps.

The crossover compartment for the woofers is located in the lowest compartment of the floorstander.
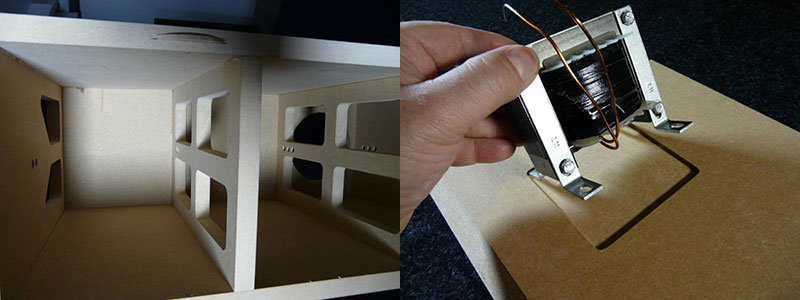
At the top left of the picture you can see the CNC cutouts for the remaining woofer volume, where two mats of Sonofil find a home. Also the small details distinguish such a kit - like here the cutout for the transformer core coil.


The lamellos give the kit a secure hold and fix the baffle. The 3 D baffle is also provided with cutouts on the back in the area of the speaker chassis.

Cabinet with baffle: ready for sanding and painting.
For a very stately speaker, the speaker cabinet didn't turn out that big. In our case, we did not glue the baffle.

So, for priming and painting it went for the Satorique 4 in the paint booth. The 3D baffle and the cabinet were to be painted signal white.
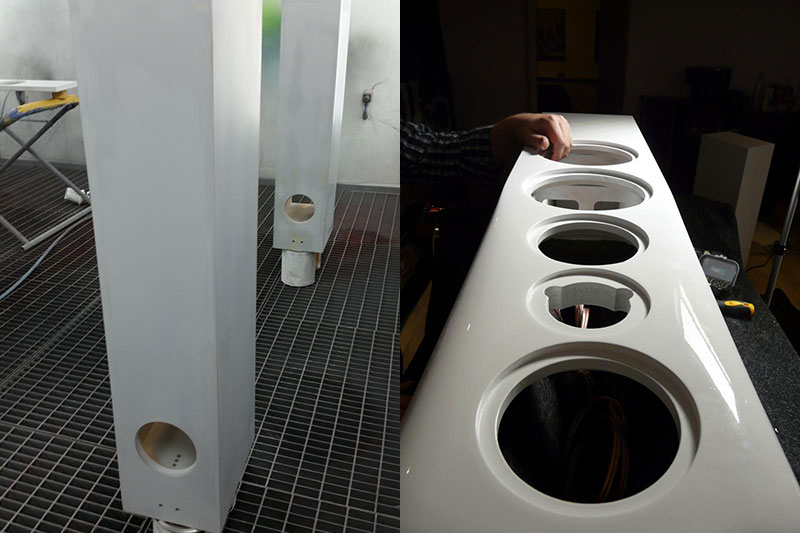
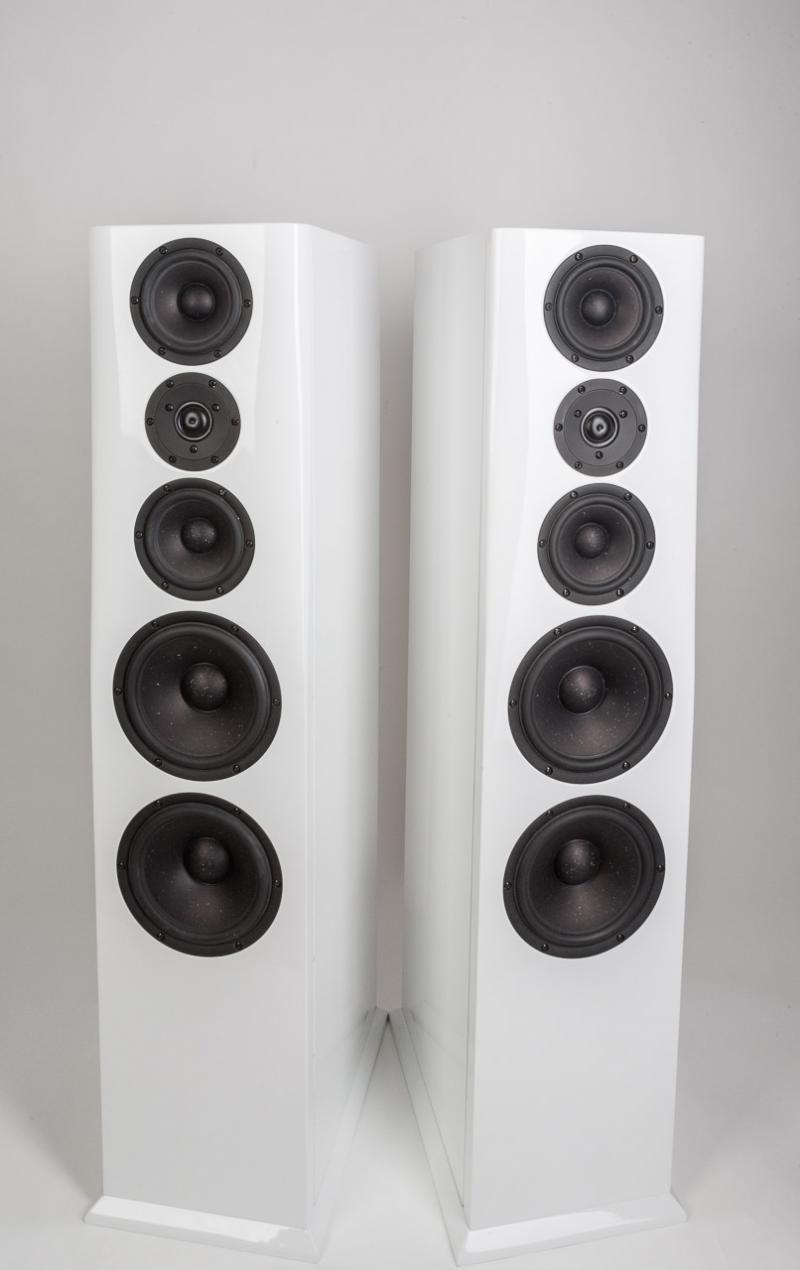
The baffle is fresh from the paint booth. The 3D front does not look cluttered at all. The light refracts at the phase in the area of the D'Appolito arrangement and shows the wonderful curves of this baffle. The silhouette thus appears very narrow and comes very close to the overall impression of an elegant speaker.
Solder the crossovers:
The crossover is neatly built on a specially milled circuit board. This belongs to the scope of delivery and is delivered ready built.
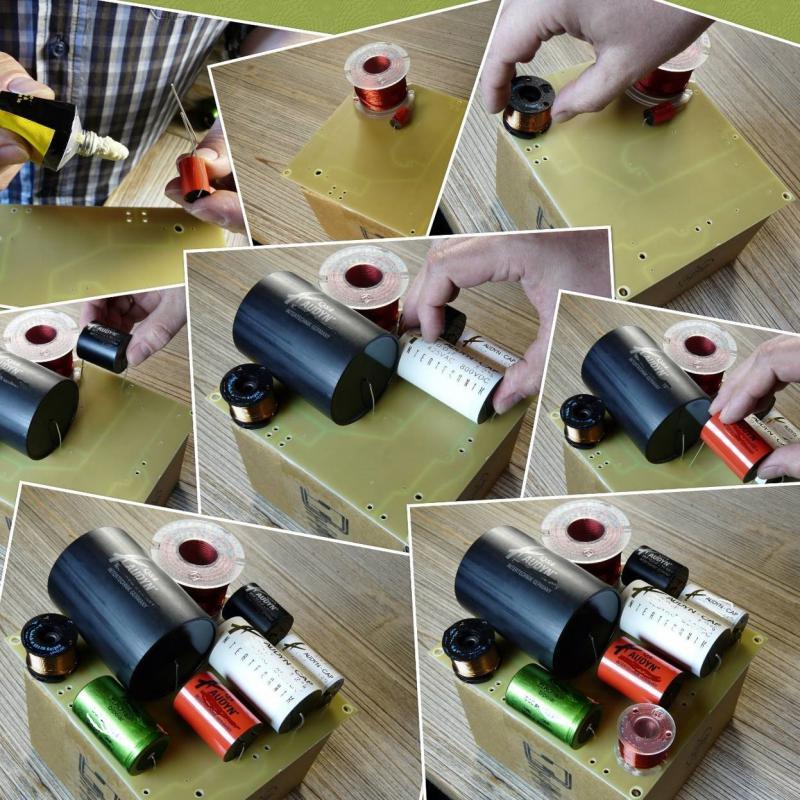
Large components, such as Audyn Caps, are glued with solvent-free adhesive and additionally secured with cable ties to guarantee durability.

Well packed between Bondum 800, the tweeter/midrange crossover finds its native place in this compartment.
The coils are also secured with non-magnetic brass screws and glue.
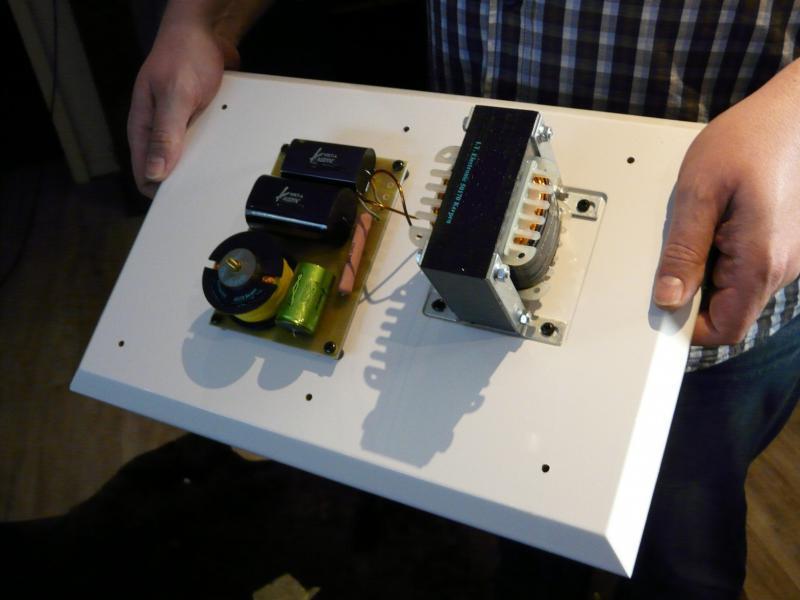
The analog high-end crossover for the woofer compartment: everything well screwed in place.
The large coil is firmly soldered to the woofer crossover. For better accessibility, it is screwed to the crossover compartment.
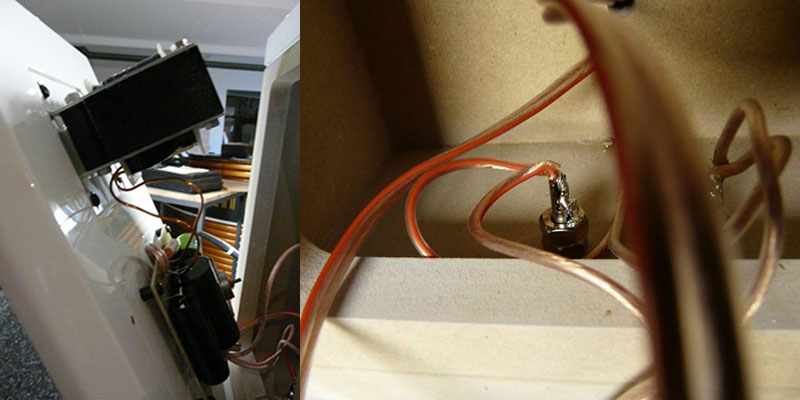
Pre-labeled cables make it difficult to mix them up. The pole terminals are soldered to the switch and the cables.
Housing insulation: Damping 10, Bodum 800, Sonofil

In a closed midrange cabinet, the Damping 10 fulfills its intended purpose at lower frequencies. In a reflex cabinet, interference in the midrange should be prevented without obstructing the flow, otherwise the bass reflex function will be impaired. Bondum 800 compressed polyester wadding, attached to the walls, is very suitable for this purpose. The rest is loosely filled with Sonofil.
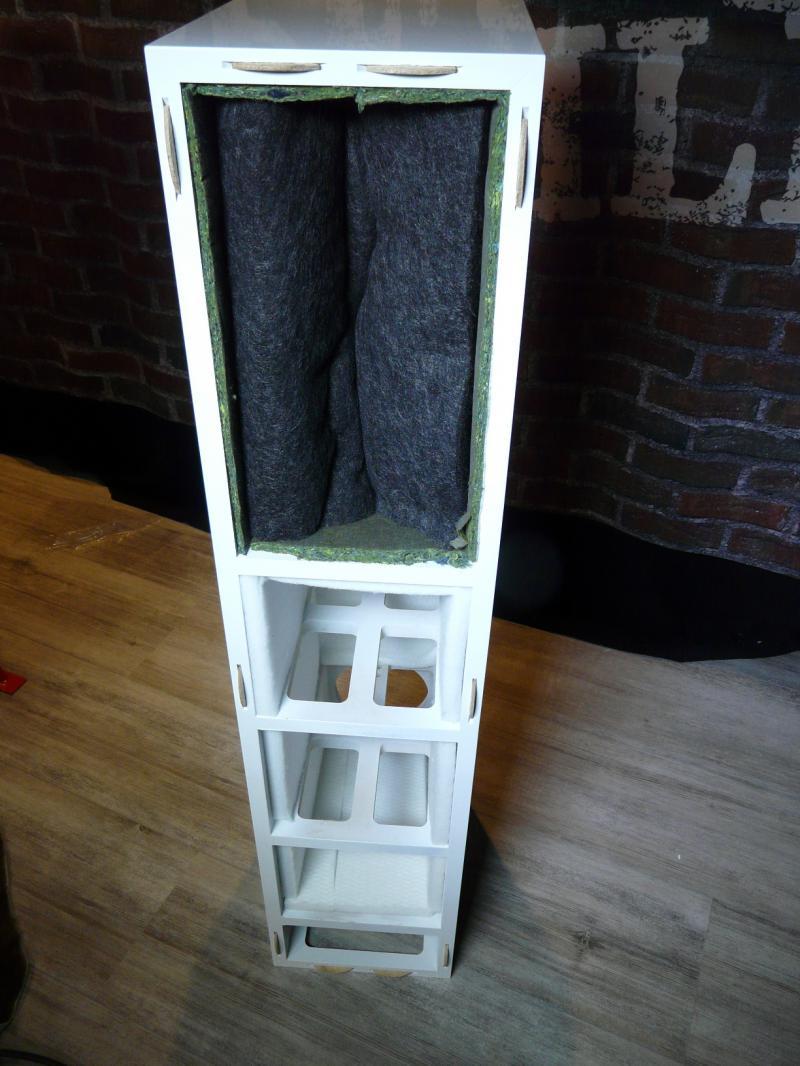
Since the baffle was in the paint booth and a minimal warpage has occurred on the baffle due to the heat development, it is advisable to use a construction PUR adhesive. In this way, you can be on the safe side when subsequently gluing the baffle because the construction adhesive fills the joints and swells.

The wedding:
Now the housing is as sturdy as if made from a single cast.
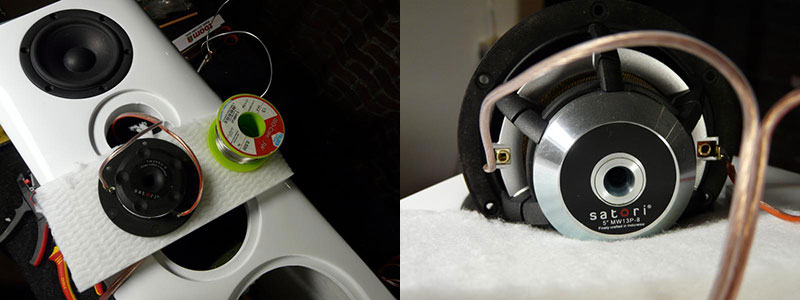
The tweeter / midrange unit is then soldered. Pre-drilling and screwing the 5 parties in one house as well asstraight alignment of the chassis pays off visually. When the bass reflex tube is inserted untrimmed into the large bass reflex port, the finished box can finally be heard.


Sound description:
I was particularly curious about the listening session with the Satorique, especially regarding the D'Appolito arrangement of the drivers. What kind of sound does this arrangement produce in our 30m2 separated listening room?
The size of the room is such a thing for itself: probably no one has the perfect room at home and often one tries to change the sound by different setups in order to avoid possibly unfavorable room modes.
Which immediately brings me to the topic of the woofer compartment: How powerful does the diaphragm area of the two woofers affect the bass reproduction? In this class, it's not about extreme power, but about the precision of the reproduction. The transformer core coil plays a decisive role in controlling the light Papyrus diaphragms - the Satorique 4 doesn't allow itself any mistakes: bass is reproduced in a structured way, with the necessary grip and without loss of control and airiness. The Satorique 4 repays this with exceptional bass precision up to the maximum volume level. It can play very loud and remains clean. The renunciation of the last bit of low bass in favor of the joy of playing such fast and light membranes fascinates me again and again. We listened with great interest to some selected CDs.
What is the sonic benefit of the D'Appolito arrangement? Is there a frequency-independent stable spatial imaging? And it came out even better than I thought: A wandering from the midrange to the tweeter, which I perceive at least acoustically with one or the other speaker, did not occur here. The virtual point in space remains. It was pleasing to see how unproblematic the Satorique 4 was in our medium-sized listening room. However, in a larger room it would certainly improve in terms of room imaging. But who has a dance hall at home?
Home cinema session: The somewhat different listening experience
And what about the home theater suitability? To clarify this, a separate listening appointment was scheduled: Some young people came to the combined viewing/listening appointment on Thursdays and also brought their Bluray player including visually accompanied music. They did not have CDs or LPs. So we quickly set everything up and wired the equipment for the music videos.
After a few listens, we came up with the Satorique 4. Since the release of the Satorique 4 was imminent anyway, we set up the brand new speakers and plugged them in.
TheSatorique 4 brings the band realistically into the room. But with the Blueray, the goosebump factor increased a lot more. I was drawn to the Cathedral live. It literally sucked me into the TV.Have I missed something so far? Blueray was not the big issue for me until now. Even at this moment, here at my desk, writing this report - with only two small PC boxes - the memories are coming back. I confess not to have heard of the band before.
Well, back to the action: The request came up to be allowed to listen louder. Of course I answered, I don't mind a little louder. But so loud - We were surprised and agreed that even for a home theater the bass is more than sufficient. Subwoofers are certainly not necessary for such concerts.
We can't remember ever turning up our stereo that loud. At extreme levels, I have rarely heard a bass foundation so precise.
The tweeter is not a whitewash when it comes to different styles of music, but is honest in its portrayal of the singers. Who does not know it when the singer sings or screams abruptly into the microphone at a live concert.
Conclusion:
The Satorique 4 prefers and neglects no frequency range, its balance in all tonal ranges it masters with a nonchalance as only known from live concerts. Playing through individual musical genres with individual disciplines in the various rock jazz blues classes could be saved. Tonally balanced in all registers, downright boring. A speaker for clean listeners.
Our Satorique 4 - Master singer -
Dear Mr. Nötzel and loudspeakerbuilding team!
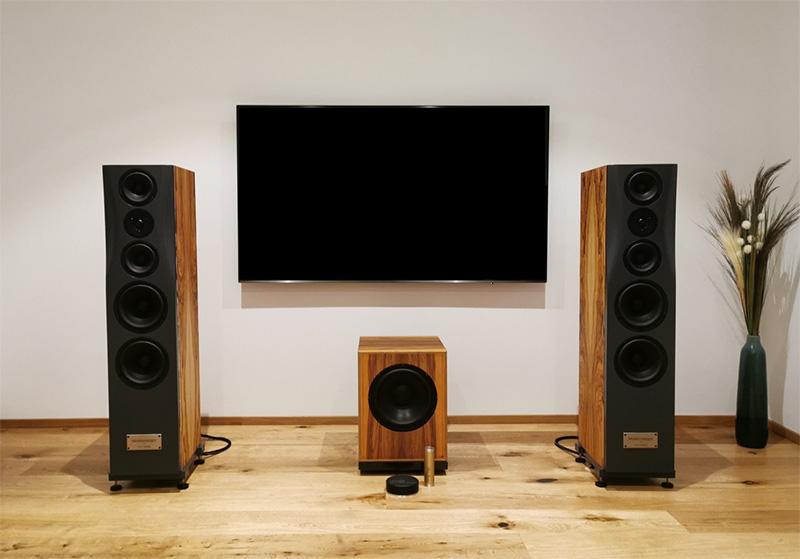
In the fall of 2019, Felix, my daughter's friend, told me about your website and I became curious. The descriptions and the appearance of the Satorique 4 appealed to us immediately and so we thought "No Risk - No Fun" and already the order was out - a decision that should turn out to be a real stroke of luck - but more about that later.
The order and all the "trappings" up to delivery went smoothly and then, it was the end of November 2019 was the package there. Appropriate to the upcoming Christmas season, we unpacked the boxes. Everything packed with attention to detail, perfectly labeled and complete (here and there some reserve, if something goes wrong) - as it should be - a great start.
While Felix, he is the IT expert of us, modeled the construction plan with the CAD software Fusion 360 and coordinated and designed the extremely pleasing 3D front with me, I was responsible for getting the necessary MDF boards, in rough cut. For the outer appearance it was clear: a real wood veneer must come, and we found at the wholesaler "olive tree" a very vivid / fiery grain.
Since we had set ourselves the goal of manufacturing everything ourselves as much as possible, we also turned the stainless steel spikes ourselves. Only for the coasters we relied on the LINN skeets, which I had already tried and tested.
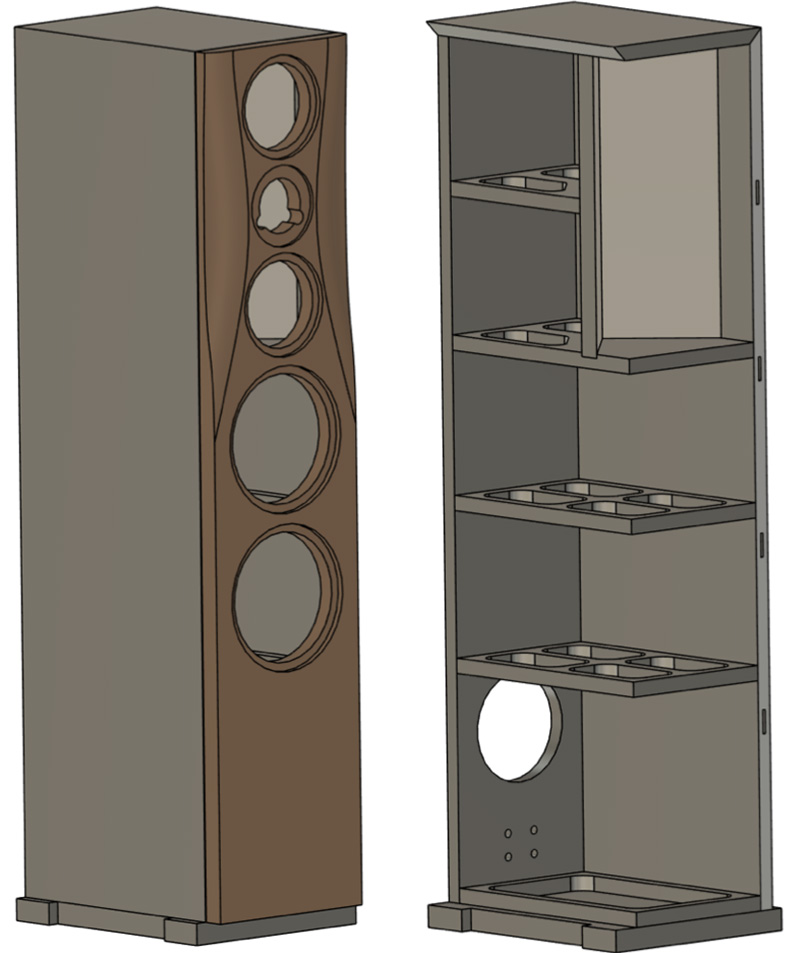
With the finished CAD files we were able to get started and with the help of Felix Vater, who provided us with his CNC milling machine, all MDF components were machined.

Impressions:
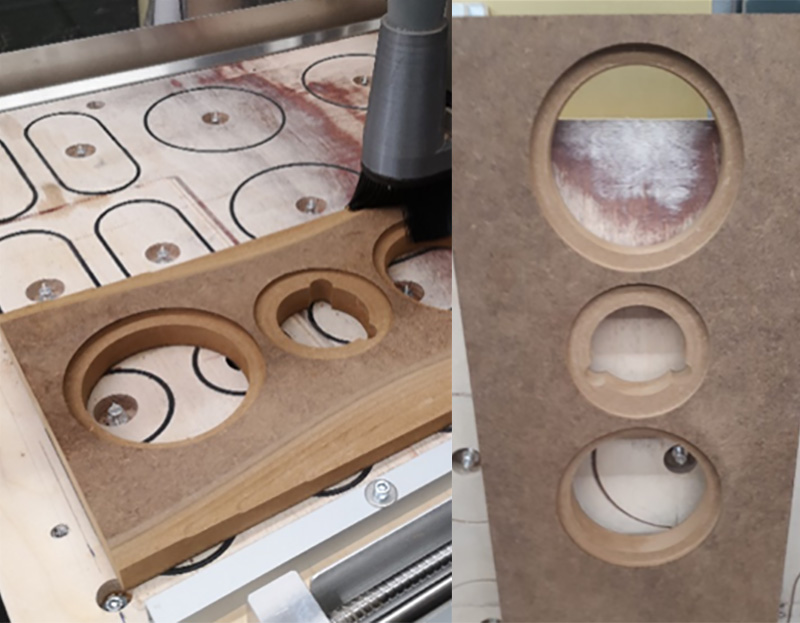
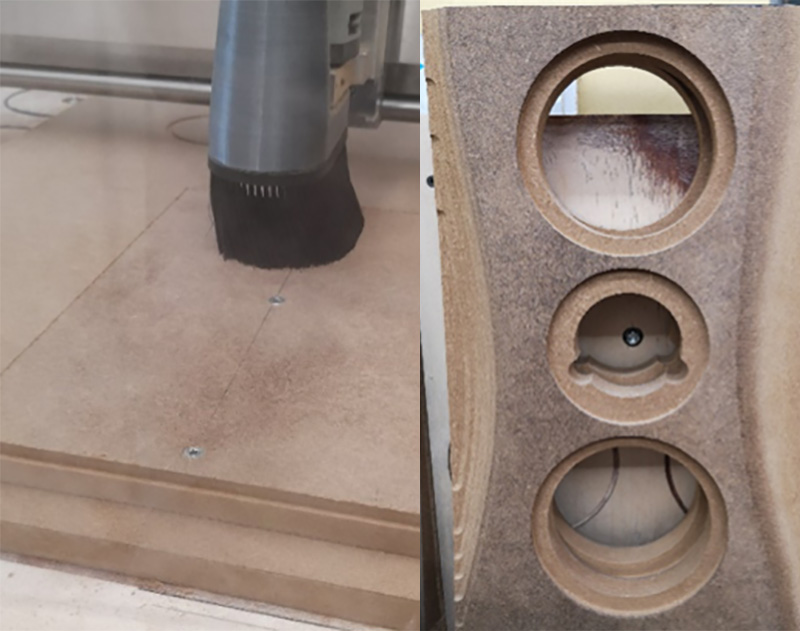
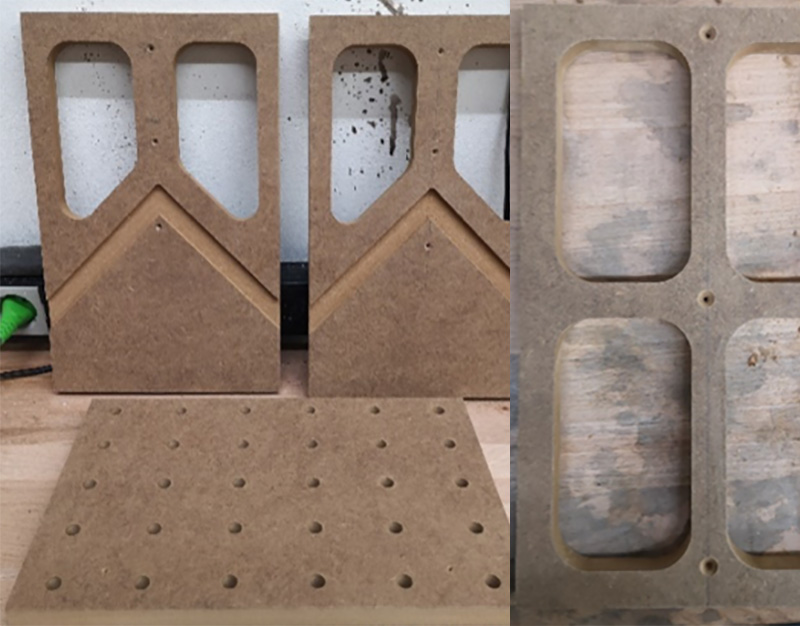
After testing the accuracy of fit, especially with the chassis cutouts, we could start with the assembly of the housing. The information of the construction plan and the instructions on your homepage were very helpful and feasible without significant problems, well, there are always a few small "problems", but that makes it exciting.
1st pass: Dry run assembly
To simplify gluing, flat dowel milled holes were added. Thanks to the precision of the CNC and careful work, the housing was already very accurate in the dry run.

After the first dry run was successful, the tricky part could begin, the gluing. First, the "tweeter and midrange" chamber outside the cabinet was glued together.
Then it was the turn of the rest of the cabinet. Here the order plays quite an important role.
Our Tip:
Glue all the inner struts and a side wall at once, so we got a very accurate and good result.

..... admittedly, it looks a bit messy, but worked out well.

A PUR adhesive was used as the glue. This promises an absolutely tight case, as it still swells while it dries. However, it is quite annoying to remove swelling glue, because even the fresh glue can only be removed more or less well with solvent.
The picture shows an almost finished glued box. Only the front still needs to be glued. This is done later, as the front goes to the varnisher and the rest of the box is veneered.

But even before veneering can be done, everything must first be sanded flat. No edge or unevenness must press through the beautiful veneer afterwards.
Now, the start of the veneer work
We lightly moistened the selected olive wood veneer in advance and pressed it for a day to achieve the smoothest possible surface during processing. This step and the subsequent plan milling of the edges (with a router) and subsequent sanding in several grit gradations was by far the most time-consuming part of the work. However, since we already had nice weather during this period, we were able to do this in the garden. With the amount of dust generated, that would have been a problem in-house.
We were able to glue the two long side parts with a vacuum press. This is practical in that the vacuum press produces a uniform and very high pressure.

After each side that was veneered, we:
1. checked if the edges are glued firmly and if they need to be re-glued
2. removed the veneer paper from the joint
3. routed the edge with the help of a router and a sharp flush cutter.
What sounds like a lot of work, it is also after several hours, one or the other necessary touch-up and sanding and a well-deserved working beer, the result looked like this:
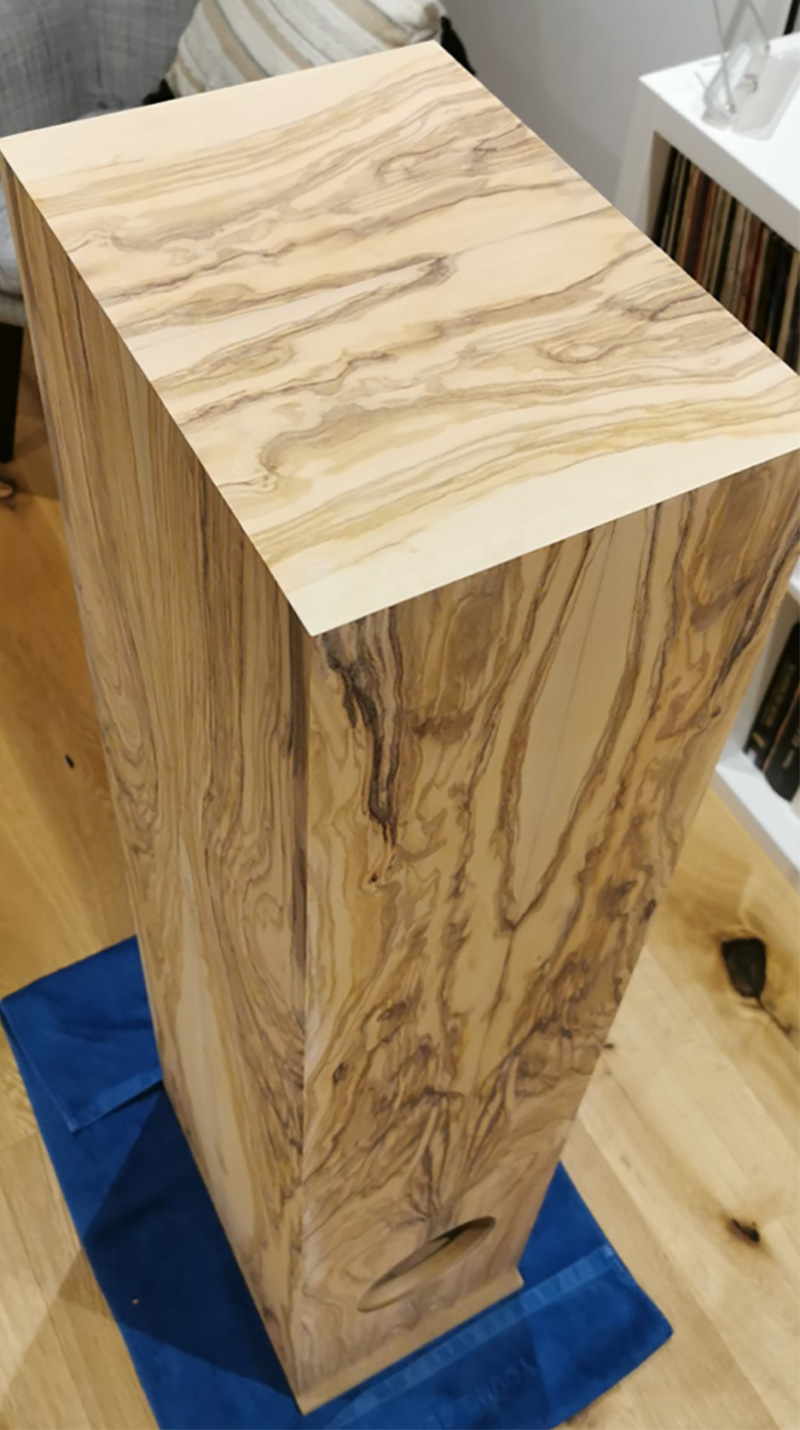
The oil used was a tung oil, which really brought the wild and intense grain of the olive tree veneer to life.

For the front, we decided to paint it gray/silk matte.
However, we left this step to the specialist - an appropriate paint booth must be there - otherwise it would have been a pity for the whole effort.
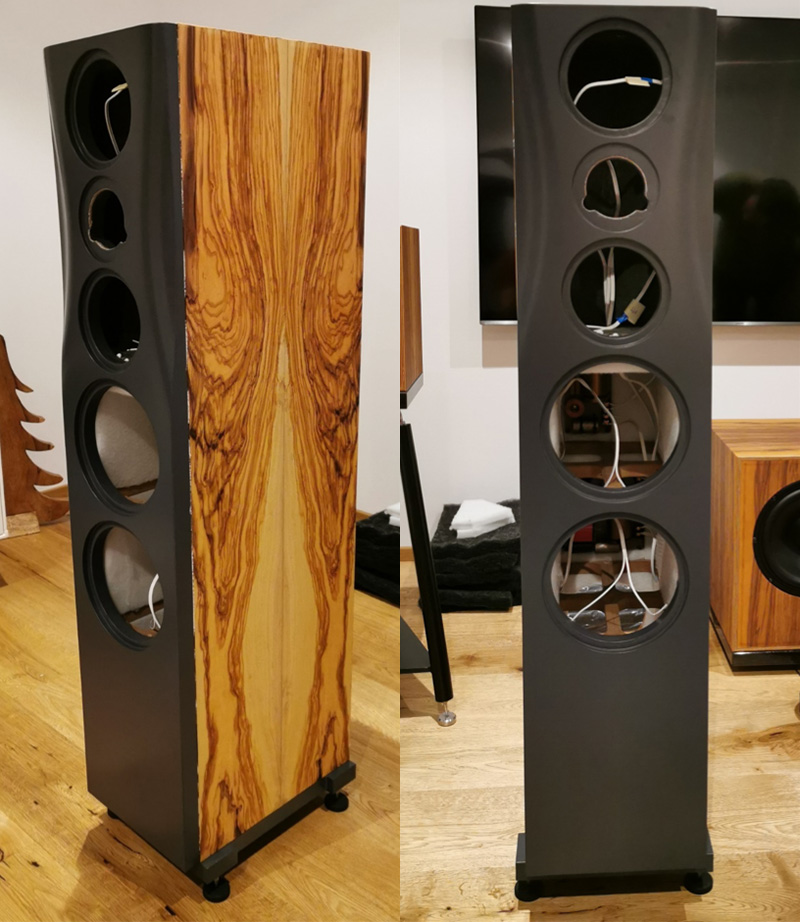
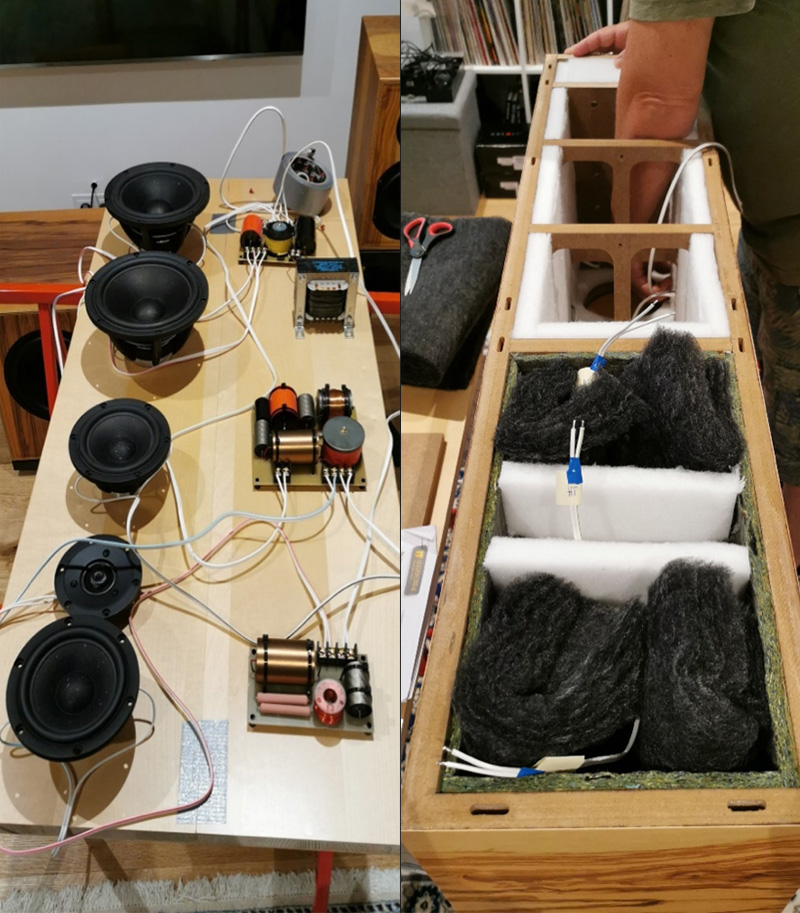
Now it was finally so far, the assembly and installation of the switches, interior insulation and wiring could start. The instructions for this - 1A! We decided on a bi-wiring design because there was already the plan and the budget for a system expansion to a horizontal BI amping, one power amplifier each for low and mid / high frequencies.
When putting the chassis in place, we had a short shock! The painter had meant it too well and we had to sand again carefully at one or the other recess. But now the chassis are really solid.
.........and finally a few impressions of the finished Satorique 4 from Felix and Gregor:


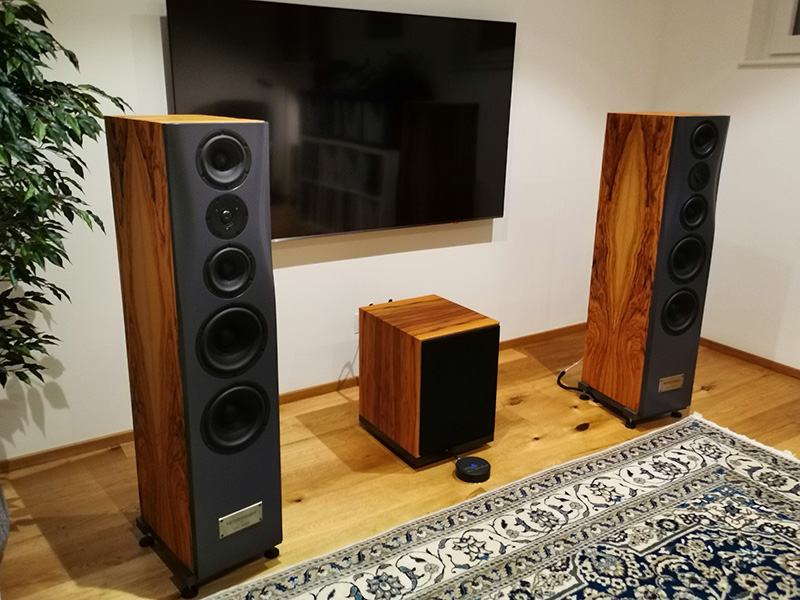
Then the moment we had been looking forward to: the first power-up of the Satorique 4 for a first check if everything is wired correctly and running.
MISSION COMPLETED
..... and now a few words about the sound / listening experience:
The Satorique 4 plays with an incredible ease, mids / highs / lows - simply everything there, unagitated, unadulterated - as it should be. At this point, a big praise to the Intertechnik team - you have developed a really coherent concept!
A loudspeaker that invites you to listen to music for hours. There is nothing annoying, nothing overdrawn and artificial in the sound image - that's how it should be. Simply TOP.
What must also be said is, it mercilessly reveals the quality of the sound carrier whether vinyl, CD or streaming. With good recordings, you are so rewarded for it.
Here is a small excerpt from the music pieces, where we were spellbound during joint listening sessions, how live, detailed and relaxed the Satorique 4 sounds:
Vinyl:
Lester Bowie - All the Magic / For Louie
Luis Armstrong and Ella Fitzgerald - Ella and Luis again / Makin' Whoopee
Frank Sinatra - Live in Paris - 07 June, 1962
Streaming/TIDAL:
Patricia Barber - Companion / Black Magic Woman (live)
Ben Webster & Oskar Peterson - The Touch of your Lips
The players, my HIFI audio chain:

Preamplifier: Artkustik Diamant
phono preamplifier: Artkustik Diamant MC
2 x power amplifier Artkustik Rubin 2 x 135W / 8 Ohm, bi-amping circuit horizontal
turntable: Pro-Ject Perspex + Speed Box
Cartridge: Ortofon Cadenza Bronze (MC)
Streaming: Mini DSP SHD
Cabling: Audio cables from Artkustik, Naim and Linn LS cables - BI-Wiring - QED Performance
Since I also like listening to classical music and appreciate music by Richard Wagner very much, Felix and I decided to name our Satorique 4 "Meistersinger (Mastersinger)" - a, in our opinion, fitting name for a really successful loudspeaker!


Finally, a big thank you again to the loudspeaker construction team - especially Mr. Nötzel, who was always there for us with questions.
Warm Christmas greetings from Vienna to Kerpen and PLEASE CONTINUE SO.
Vienna, November 2021
Felix and Gregor
PS: To all who read our story: it is simply incomparably beautiful to build a loudspeaker yourself, the emotions when the first notes are heard - that is wonderful.
Just try it out!
Pärs second Satorique: The S4 from Sweden
Hi Marcus, I promissed you some words and pictures about my S4 construction
Here you have my review:

I simply couldn't hold back and I really wanted to continue building. So I decided to upgrade the Intertechnik Satorique 3 to the Satorique 4.
Just last summer I built the Satorique 3 speakers and have been really happy with these and I still am.
However, I enjoy building and wanted to take advantage of what I have learned. Therefore, I was very curious about what the larger model could do to the sound stage. With the experience I got from the previous building I wanted to make these speakers even better.
After some planning, lot of thought and good dialogues with Marcus from Intertechnik, I ordered the parts needed to to build the Satorique 4 speakers. Fortunately I can continue to use the tweeters and bass speakers. I sent the crossovers back in exchange for new items needed for the project. The mid-woofers, some other elements and the empty cabinets are left over and I hope to find another project for them soon. Or maybe someone who is interested in the cases.
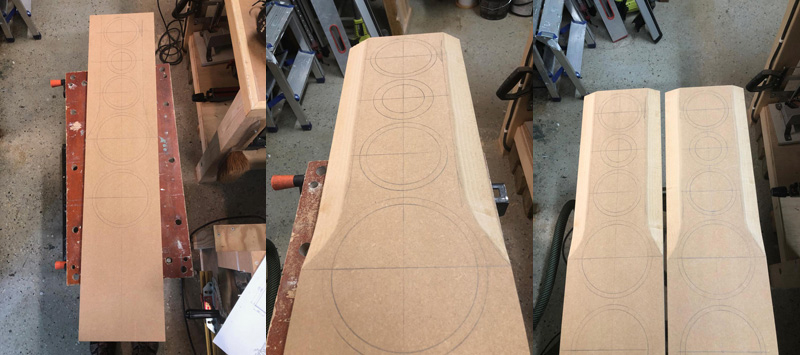


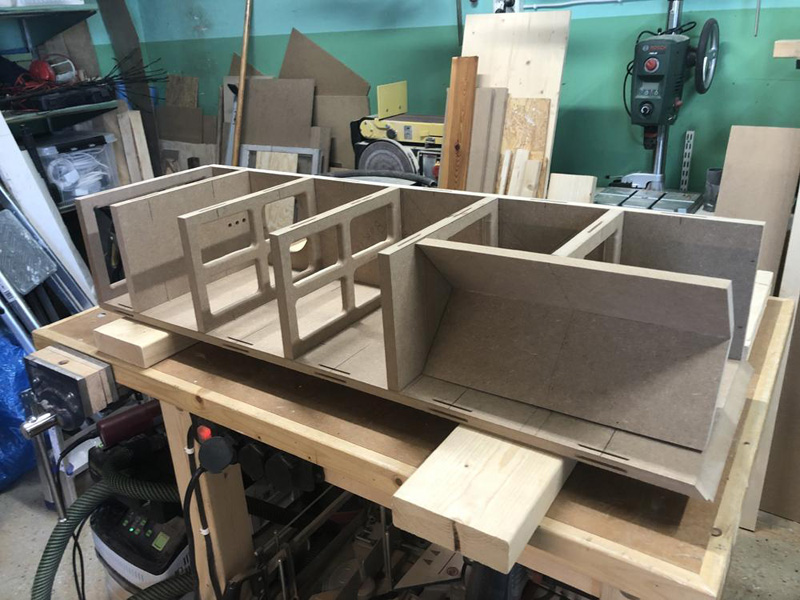


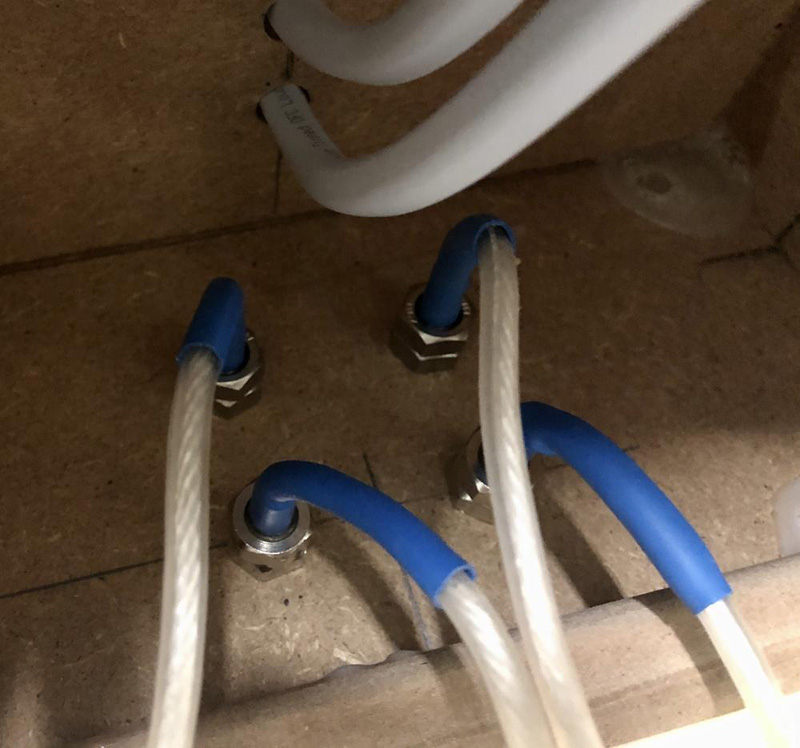
Many hours later
Right now I am sittimg here with a big smile on my face and enjoy an incredible soundstage and well-tuned bass and a magical midrange.
I really do not regret that I took the step and upgraded to the Satorique 4.
They play incredibly well with a good spread in the soundstage. Treble and midrange are very detailed but at the same time easy to listen to and the bass is punchy and powerful in a controlled manner.
Regards /Pär
Satorique 4....I am building something new
Contribution from Markus
I am not a great storyteller. But a few sentences I would like to write now, otherwise I think the pictures say more than a thousand words. After 32 years "Pyramid" (see penultimate picture) it was time for something new. I have read a lot on the Internet regarding self-build speakers. I finally landed here. As I find, exactly right.
At first I was torn between Satorique 3 and Dreamcatcher 2. I ended up with Satorique 4. Also because my wife said, if already, then already.
I have not listened to any of them. I have oriented myself only on the reports here. Decided ultimately the gut feeling, which has never disappointed me. I am not clueless about woodworking, is among other things one of my hobbies. Have already built several complete kitchens, bathroom furniture and other smaller pieces of furniture. So if I do not go into every single processing step here, I am still open to questions at any time.Zum Zuschnitt
To the cutting
I used MDF 19mm for the body. Actually, I cut everything myself. But in this case, the hardware store can do it much faster and more precisely than I can on the panel saw. I do not want to advertise here for Bau....s in HD, but the cutting there is top. Fitting to the half millimeter. I made the miter cuts myself. So the sides that I still sawed myself, I ordered accordingly larger.


I glued without lamellos or the like. If you tighten the screw clamps sensitively, nothing shifts.


When it came to painting, I was persuaded to use a water-based varnish. (One wants to be environmentally friendly). I have certainly painted 4 times with the roller and also 4 times everything sanded again. I do not get along with this stuff. I just did not get a smooth surface. The stuff just dries too fast, you can not correct anything. In the end, I ended up with a solvent-based paint. It worked right away. The varnish gives you more time and also runs very clean.

Front and back I have then provided with 32mm beech heartwood. But none of the hardware store, but ordered online from a gluelam manufacturer to measure. Again, perfect to the millimeter.
For the shaping of the front, I used the "Agile" as a model. The corresponding tool for milling the bevel can be seen in the pictures. I then sawed the transition with the Japanese saw and finely sanded it with the Rotex (180, 240, 320).


The front and back were treated with Osmo hard wax oil, which I also use for all the furniture I have built so far.


Now they are ready, the Satorique 4
Building was a lot of fun, I would do it again anytime.
But I was also very impatient, and eager to see what then finally comes out of my "wooden boxes". After all, I bought "blind", or one must say, "deaf". It is now a week since the initial commissioning. I have found, one needs time and muse. With yourself and with the Satorique 4. The whole reveals itself to you gradually, if you listen to music consciously. You know your repertoire, what you listen to all these years, by heart. Deep Purple, Pink Floyd, Leonard Cohen, Mark Knopfler, Eagles, to name just a few.
But suddenly you discover and hear things that were never there before. Everything is more differentiated, clearer, more spatial. The singer is right in front of you. The bass, not obtrusive, but dignified crisp, dry, simply ingenious. I almost have the impression that the speakers are getting better every day.
I am sure I have done everything right.
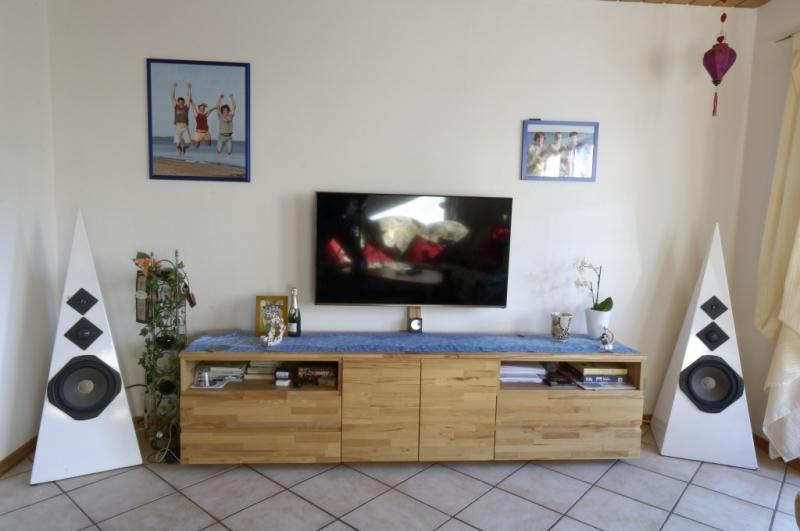
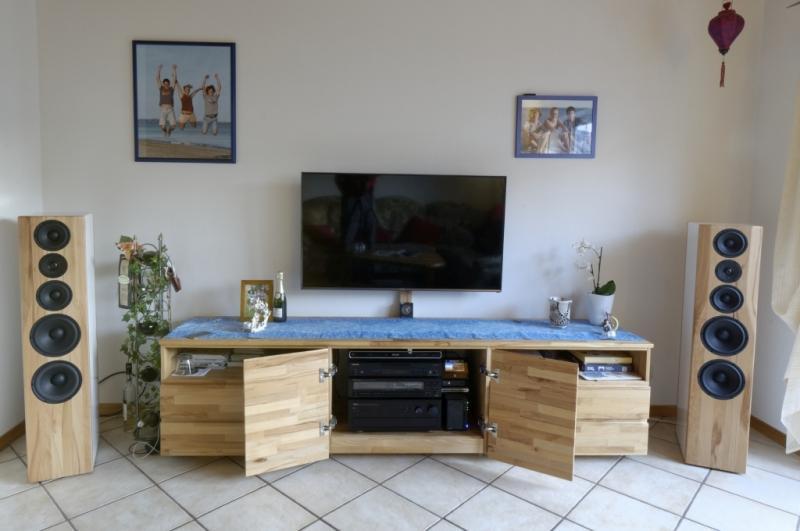
Many thanks to the developers of these great speakers. Very great.
Many greetings
Markus
Satorique 4 built in the beautiful Black Forest
Contribution from Achim
Me and my apprentice Yorick had a lot of fun building these speakers.
As a master painter, it was very important to me to place great emphasis on appearance and design.
On the pictures you can see that we filled the curves at the front at right angles.
This allowed us to mill a chamfer around the front.
Yorick was a great help there, as he knows his way around the router.
2K polyester filler, Mdf must be primed beforehand.
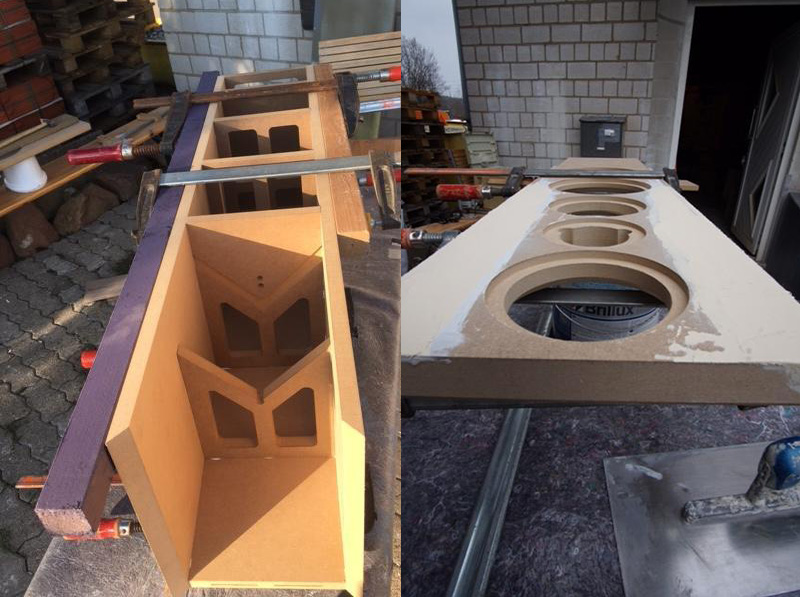
The boss at work.

The apprentice at work.

Milled front bevel and also a small bevel on the corners around.

The bevel on the front was painted with anthracite and the finer bevels around the sides in black.
The very beautiful egg veneer we finished with wood oil.

Here we have already moved to the apartment.


For the brushed aluminum front, we have invisible magnets embedded on the back.
Of course, the Yorick has milled the exact fit again.

There she stands!
It was great fun to combine the technical expertise of the development team with the craftsmanship of me and Yorick.
I always wanted to listen to my music with good sound, so it always annoys me to hear badly mastered music.
The last 5 years I was with my Infinity Irs Omega yes already at a high level, when I had started together with Yorick the premiere, we were simply thrilled by the sound of the great box, brilliant bass from the bottom out, perfectly matched with the height and the middle.
Actually, soccer was on that evening with "SC FREIBURG". We are big fans of this great club here around the corner and never miss a game. What happened?
We listened to the Satorique 4 and forgot about the soccer.
Thanks for the awesome sound.
Have all fun with the high-end self-build.
Gruß Achim
SATORIQUE 4 – A short Christmas story
Contribution from Vlada
After I have built with my father in the summer after Marcus's recommendation blindly the Satorique 2 (of which I have also written a report) and the result was such a great surprise in all directions, I began to be very curious, how must then the higher series - the Satorique 4 - sound.
In the meantime, we also visited a hi-fi studio, where more expensive high-end box was demonstrated to us with great expectation. There you can not imagine how happy I was when I had to admit that my S2 play better and that they are worth every penny.
Mid-December 2016 - After much deliberation about whether it was really worth it to put almost twice as much money (compared to S2) into homebuilt speakers, I finally called Marcus from I.T. again, and after a short conversation agreed and ordered. Because the winter was unfortunately ahead of us, I knew that the construction will be a bit more complicated than in the summer.
A large package
Because I was a bit lazy this time and the cutting of the whole box was cheap, I ordered the same. So you can easily build the boxes almost "instant".
Two days before Christmas, the shipping company rang and down in the basement was a perfectly packed box on a pallet - a great Christmas gift that weighed 96 kg.

Because all parts were made on a CNC machine, the gluing is very simple and precise work. It is enough to have only the joiner clamps and Ponal D3 glue. The Lamello flat dowels on the edges simplify the assembly.
So, on December 24, we began the assembly.
Enclosure
First, the inner parts are glued together with the rear side and a side wall. Everything must be firmly fixed with the carpenter's clamps. Apply enough glue until it comes out in the corners.


When all the inner "ribs" have been built in, you can then close the "box" with the second side wall.
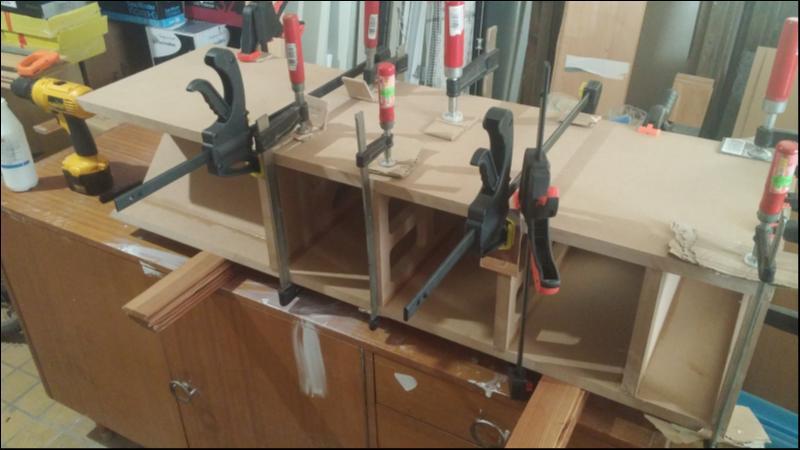
Next day, the superfluous remnants of the glue on the edges sanded. Then you have less work in painting. The transitions between the MDF boards must be totally smooth.

Meanwhile, we were called to dinner on Christmas Eve. It was a pleasant break.

The rear side was painted with white polyurethane 2K paint. Later still varnish is applied.
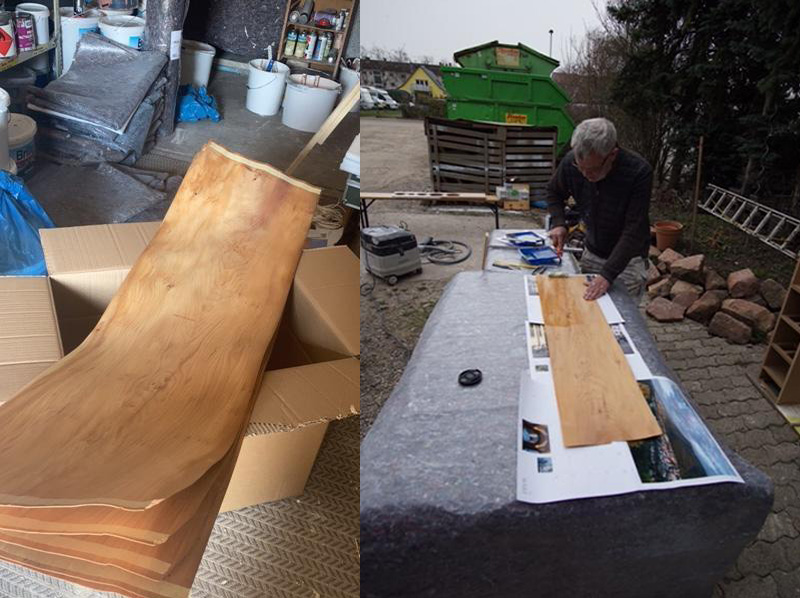
We built the Satorique 2 in white color/rosewood veneer combination. The S4 should get the same suit. The front and back will be done in Signal White gloss and the left, right and top will be veneered with rosewood. This time we wanted to try veneering ourselves instead of giving it to a carpenter. We were surprised how easy it ended up being. All it takes is contact cement in a spray can. Then spray MDF and one side of the veneer, wait a short moment, put it together and fix it for about 2 hours.
The veneer is simply cut with scissors like wallpaper.


After a few hours, the edges of the veneer are cut off and fine sanded with a sandpaper. Then the parts are oiled with hard wax oil from Remmers.

The oil perfectly reveals the structure of the wood and protects the surface from mechanical damage, giving it a smooth sheen.

This is how the page looks before and after the application of the oil. Darker and with more details.


Before closing the box from the top, do not forget to line the interior behind the midrange-tweeter chamber with the sonofil. Do not forget also on the upper side, there must also be the Sonofil (TM).

While the box dries, the crossover is built. The included PCB makes it easy to solder all parts correctly.

Ready for action
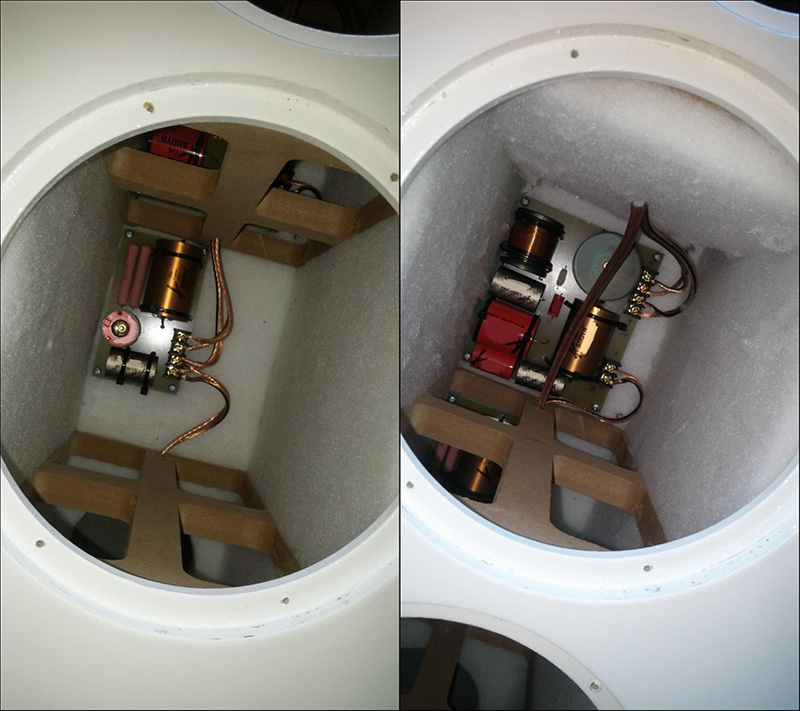
Now we work on the interior, the walls are covered with the Bodum or damping material and the crossover is screwed to the rear side under the upper woofer.

The front came from the painter and it looks great.

Now the front can finally be attached to the rest of the box. For this purpose, many towels were used to protect the freshly sprayed surface.

Well, and after a long wait, the finished box can finally be placed next to its smaller sister - the Satorique 2. A nice view, isn't it?
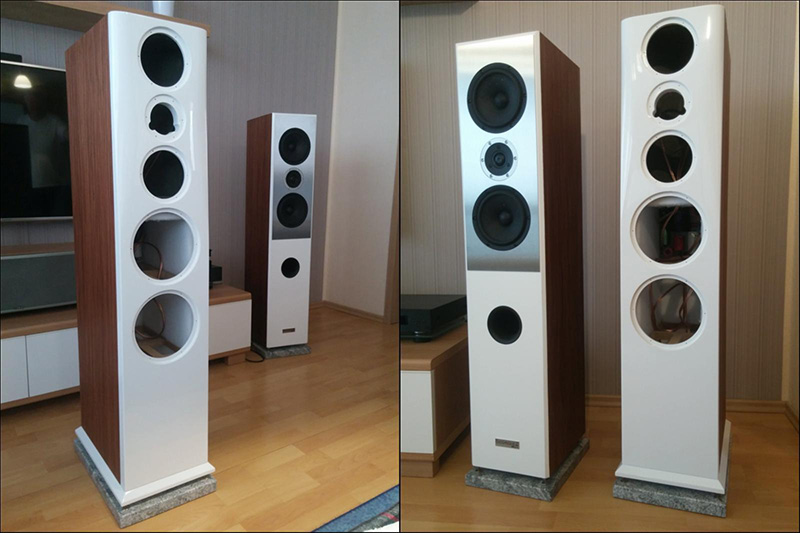
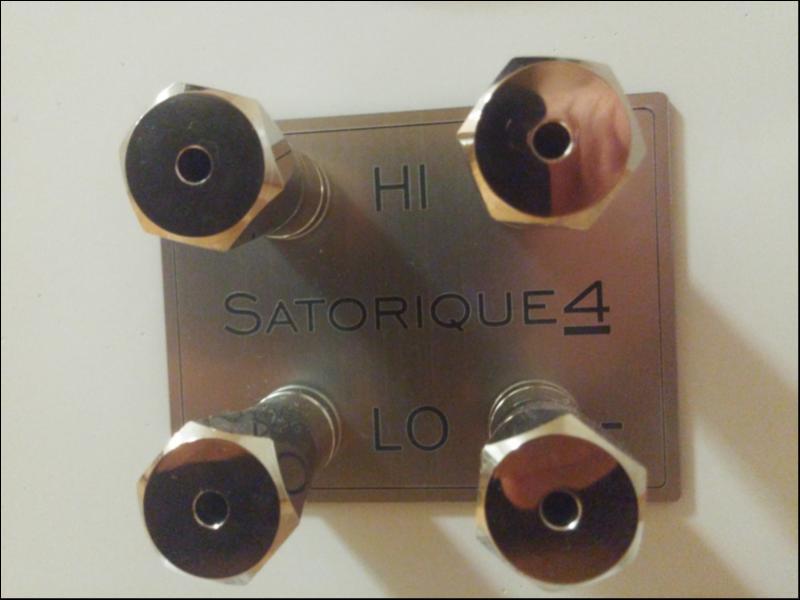
The large transformer and the bass crossover are mounted on the base and the rear terminals get the label. Then just fix the chassis with the screws and the box is ready. Under the chassis I still stuck a line of the foam sealing tape (supplied), so that everything sits perfectly and seals. The HT-MT box needs to be sealed perfectly so that the two MTs work like one piston. When you push one MT, the other is forced out. In are also installed the two triangle blockers from Bodum800. You still have to make enough holes in the bottom floor.
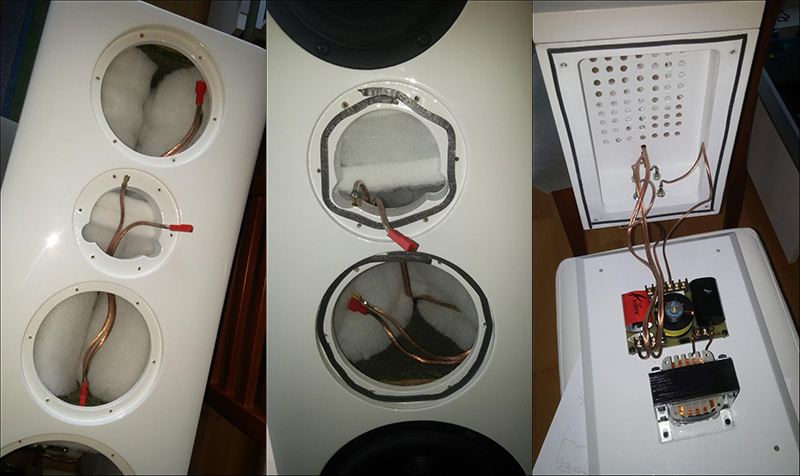
Then I attached the HT and MT turnouts to the rear side. The cables are passed through the holes in the sides. I soldered to the cable ends on the sides of chassis FAST-ON connectors.
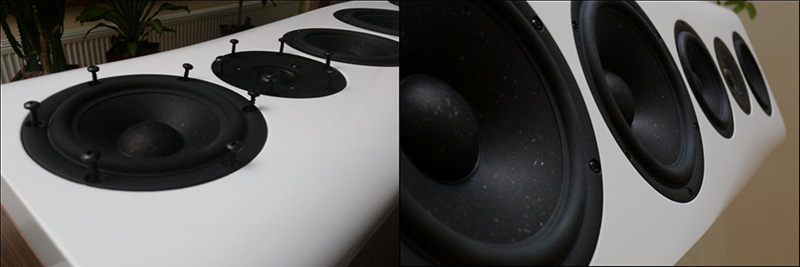
The spikes are mounted to the underside of the base and off to the legs, beauty. The box gets, as with the Satorique 2, a French granite base.

And the most important comes at the end
What about the battle between S2 and S4. A question that interested me even before the build.
As I wrote in my review of S2, the S2 was for me a big surprise in the presentation of spatiality, the truth of production, the simply perfect to the size of the box not bergreifliche bass reproduction, a lively real voice reproduction and many other things that you do not expect and expect from such a small box. The S2 is simply a must for anyone looking for the best price / performance ratio. And the S4? I have to admit that the very first notes were somehow different. I ran You and Your Friend by Dire Straits again and I recognized the same tone color as it was on S2. So everything was fine there. The bass was also quite alright, S2 moderately. Well, but there I was wrong. There are actually no deep basses in the track. They came later. Every next track I played, every now and then there was something coming out of the speakers that I didn't recognize in that track. It was kind of strange. But that's just the difference between the S2 and S4. The lowest bass is only played on S4. But not over the top, like you know from cheap "Rutz-dutz" speakers, but subtle when you don't expect it and strong and dry when you want to hear it louder. So I started p

