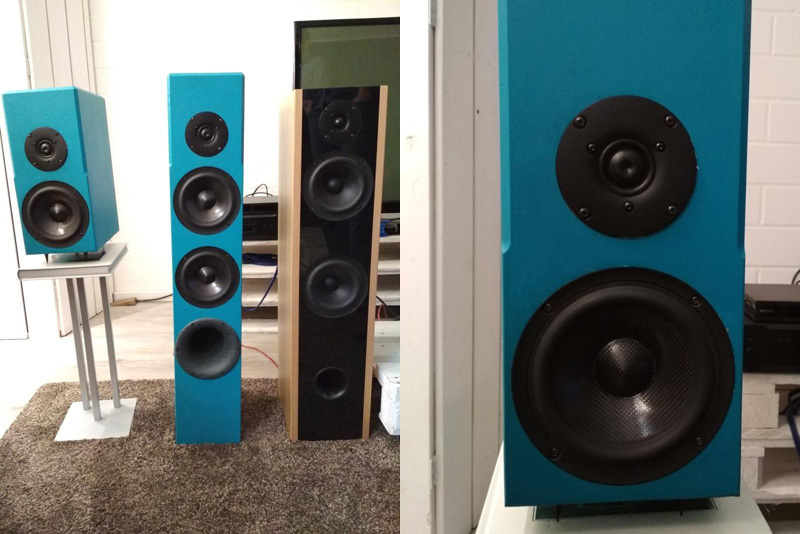
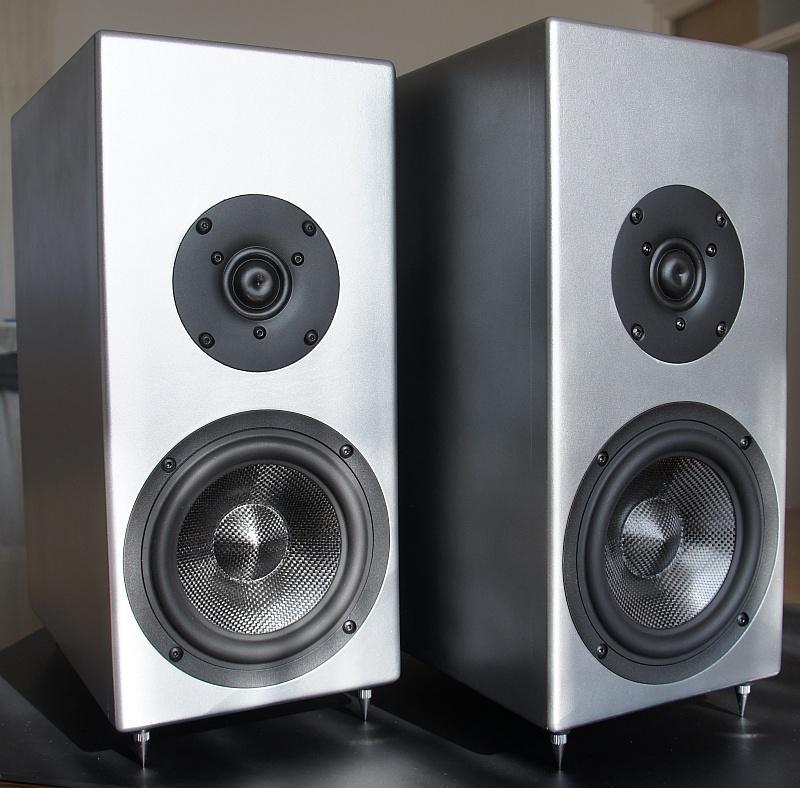
Compact speaker for audiophiles with expansion possibility
Contribution from Marco
Previous story
For some time I had been thinking about replacing my somewhat aged Altec Lansing ADA 885 (2001!). After all, these PC speakers were THX certified and I was looking for speakers that could be used for stereo enjoyment as well as for a home theater system.
Some time ago, a good friend pointed out to me that there are also speaker kits that meet both my requirements. An advantage in addition to the unique price-performance ratio in a kit is that you can also make the speakers a very personal unique by certain freedoms in the optical design.
We first wanted to listen to the SB18 and SB36 and arranged a listening appointment at Intertechnik. There, Marcus introduced us to the BeatClub in addition to the SB models and we immediately fell in love with the clear and expressive sound. I was particularly taken with the Soloist, which despite its smaller size is in almost no way inferior to its big brother (BeatClub Base). At this point I would also like to thank Marcus who took the necessary time so that we could form an opinion with our test CD.

Build loudspeaker yourself
One thing in advance: When reading, you may get the impression that it is difficult to implement such a project. On the one hand, this is because this project is my first speaker project and I am quite inexperienced in the field of woodworking. On the other hand, I believe that a construction report is especially valuable if it also describes the problems and failures. Rather, I would like to encourage interested audio enthusiasts to start a project themselves, as I am convinced that you will be rewarded with a great sound experience and learn a lot in the process.
Speaking of problems: After cutting the MDF boards, we already had the first setback: we had chosen boards with a thickness of 19mm. But during the cutting process, obviously some 16mm boards were used, so that we only noticed at home that some boards were too thin. Unfortunately, this affected not only inner panels but also side panels. So the first day of our project came to an abrupt end.
Construction Tip: Check the thickness of all panels after cutting.

In the next step, all parts were assembled, adjacent plates were marked and all plates were named and labeled according to their later position. This gave us a first impression of the final size. In order to ensure that the panels are in one plane when gluing them together later, we decided to join them with flat dowels. As you would expect, you have to mill the narrow side of some panels with the flat dowel cutter, which works very well because of the guide pieces on the cutter, which then rest against the flat side. However, with some slabs you have to mill on the flat side, so the guide piece only has a small bearing surface and it's easy to set it too high or not square. If this happens because you are a bit unfocused and have little experience with the router, you will have a problem afterwards. Eventually, you can't put the parts back together, so your only choice is to not use some grooves that don't fit or to get new plates. We chose the first option, which resulted in an unsightly hole at the height of the mid-bass driver, for which you have to mill out the cabinet almost to the edge. This hole is just one of the unused grooves and is fortunately no longer visible after mounting the chassis.
Construction tip: Use the right guide pieces when milling and work with concentration and precision.

Now the panels can be glued. We decided to first glue all sides except the baffle incl. the separating board in the first step. In a further step, the baffle was glued. Afterwards, the glue residues were carefully removed with a crowbar.

After that, the transitions were covered with putty and all surfaces were sanded to even out the transitions. Unfortunately, it was not possible to hide the transitions, as they are clearly visible, especially in conjunction with the silver paint. In a further step, the first coat of primer was applied and all surfaces were sanded again.

In order to make the shape more interesting and to prevent the paint on the corners from cracking in everyday use, we decided to round off the edges. To do this, we used an edge router with a radius of 5mm. Then the opening for the downfire bass reflex tube was milled first. After that, the openings for the tweeter, the mid-bass driver and the rear-firing effect tweeter were milled one after the other. In addition to the various radii and depths for the frames and the bodies of the chassis, the cutouts for the tweeter terminals also had to be taken into account. Furthermore, the center point of the rear-facing effect tweeter, which deviates from the center line, had to be taken into account.

In order not to make any devastating mistakes during milling, we tried out the settings of the milling machine on a test piece before each work step. This approach paid off more than once, as we obviously neglected to adjust some settings in the heat of the moment. In this way, we were also able to precisely adjust the openings to the chassis in several steps. In addition, we first tested the silver paint on a test piece, which we primed and sanded several times with ascending grit, just like the cabinets, to gauge the appearance. Finally, we also determined the ideal rounding radius for the edges on a test piece, according to our taste.
Building tip: Always try out larger work steps on a test piece that is as realistic as possible.

After rounding off the edges, the housings were primed twice more, for a total of three coats, and sanded with ascending grit (up to 320) on all surfaces. Particular care had to be taken with the edges of the cabinet and the edges of the openings for the chassis. For painting the cabinet, we decided to use a spray paint in the color silver metallic after testing it on a test piece. Since the contents of one bottle according to the label was sufficient for an area of 2 ¼ m² and we did not know whether we would like the color, we initially bought only 2 bottles. However, to create an even spray mist it is necessary to spray the cabinet from a certain distance. In doing so, a large amount of the bottle's contents is lost unused. Also, it is not possible to use every last drop of the bottle's contents because, despite vigorous shaking before spraying, metallic flakes collect at the bottom and are then ejected just before the spray bottle is emptied, ruining the paint job. When we went to buy more cans of paint, it turned out that the hardware store chain and even the supplying manufacturer, had taken the paint out of the range. Since the successor product had a different EAN and we didn't know if the color had been changed, we went to great lengths to purchase the last bottles from a distant branch of the home improvement chain.
Construction tip: buy spray paint generously.

After the painting work was finished, first the holes for the terminals were drilled and fixed with the enclosed nuts. Then the corresponding cables on the turnout were shortened, pre-tinned, soldered on and insulated with heat shrink tubing. The crossover was then attached with hot glue to the rear wall of the housing, centered between the terminals and the effect tweeter.

Now that the required cable lengths from the crossover to the chassis were determined, the corresponding cables could be shortened, pre-tinned, soldered on and insulated with heat shrink tubing. To protect the chassis from solder splatter, we used a cover.
The positions for the chassis mounting screws were marked with a center punch and pre-drilled with a thin drill bit (2mm). For a coherent overall impression with the metallic paint we painted the mounting screws of the chassis black.

Before inserting and screwing the bass-midrange drivers, we draped a so-called nest of insulation wool as described in the assembly instructions and folded in the signal cable accordingly. After that, the bass reflex tube was inserted.

Since the Soloists have a downfire bass reflex system, you can't just place them on the bottom of the cabinet. You need feet that create a certain distance between the footprint and the bottom of the cabinet. In addition, it is desirable that the sound is not affected by vibrations transmitted through the speaker to the floor space. For this purpose, we decided to use spikes in the color chrome. To do this, we first drilled a hole for the receptacle on the cabinet side. This receptacle is hammered into the housing and the spikes are then screwed into the internal thread of the receptacle. For aesthetic reasons, the symmetrical joint between the plates seemed to make sense to us as a position for this. Since we drilled the hole for the receptacle exactly with the specified diameter, the housing was torn apart when the receptacle was hammered in.
Since we couldn't pull the receptacle out either, we had to sink the receptacle completely into the housing and the crack continued. For the remaining studs, we therefore widened the holes for the mount without sacrificing any stability in the connection between the mount and the housing.
Construction tip: Widen holes for housing spikes.


Listening impression
I am currently using the Soloists with a compact Class-D amplifier (Breeze Audio BL10B) in the living room at a distance of about 3m from the listener.
My enthusiasm for the Soloists has been unbroken since the first listening session. My specimens sound the same and you would love to replay your entire music collection on them to discover specifics and details.
On pop tracks like "Randy" by Justice, "Run" by Veorra, or "Until we go down" by Ruelle, I appreciate the dry bass and effects-heavy highs. Here, the rear-firing tweeters are the salt in the soup and extend the brilliant sound.
With guitar and vocal-heavy songs such as "Long for you" by Mar, "Let it go" by James Bay and "State of Mind" by Raul Midon, the precisely resolved mids and highs as well as the excellent dynamics thrill me.
With soundtracks and orchestral pieces like "007 And Counting" by John Barry (Diamonds Are Forever OST), "Why So Serious" by Hans Zimmer (The Dark Knight OST) and "Find me when you wake up" by Christophe Beck (Edge of Tomorrow OST) everything comes together and the soloists can unfold their entire performance spectrum. All the previously mentioned qualities and at the latest a sub-bass that shakes to the core put a smile on the listener's face.