



Satorique S4 Center - large center with hi-fidelity qualities
There are already so many Satorique S-Class speaker building proposals with the same technology, because it just sounds great and offers an outstanding dynamic range from very quiet to extremely loud - and always with excellent, fine and detailed resolution.
That's why it's really fun to design and build Satorique boxes. The prospects of success are simply too tempting not to keep building new speakers. Given the high demand for Satorique speaker kits, the ultimate uncompromising center speaker has simply been missing, a speaker that plays perfectly with Satorique S4 and Satorique Petit in the living room.
Curious now? Read the report.
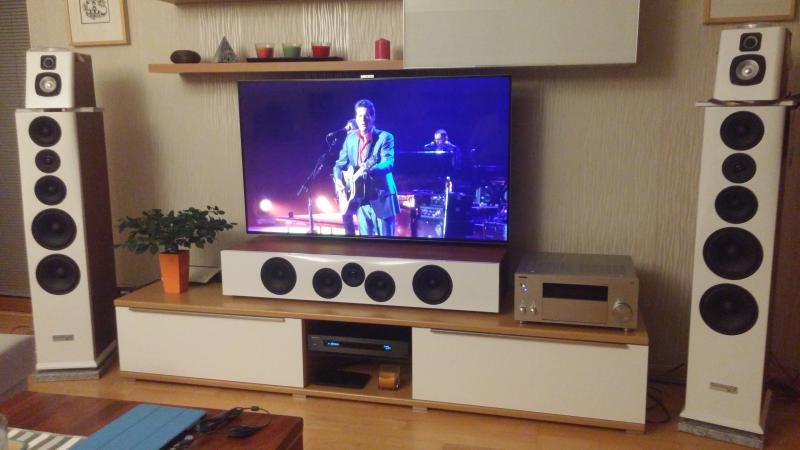
Outstanding dynamic range with excellent, detailed resolution
And so it started as usual with the work on the PC: hours of housing simulations. But not as usual, so directly directed at the listener, but slightly angled upwards. After all, the center is under the screen and not in the picture - to which you want to assign the sound. Also important, not everyone is single and sits lonely in his armchair directly in the sweet spot, which was previously calibrated and optimized with DSP. No, we wanted to design a center speaker that reproduces the center signal cleanly and audibly everywhere for all viewers in the home theater, that has enough lateral bundling and yet doesn't play too wide. And flexibility in the listening height was important to us during the development. Well, and as it happens, the result is a loudspeaker that can be placed on one side, raised a bit and used as an excellent column, and that can be used all around as a quarter-sided loudspeaker: 5.1 says hello.
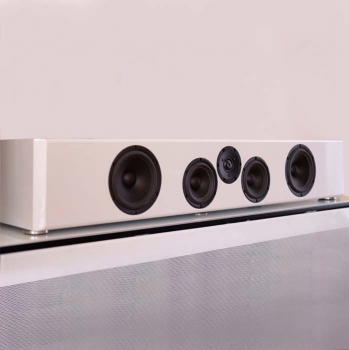
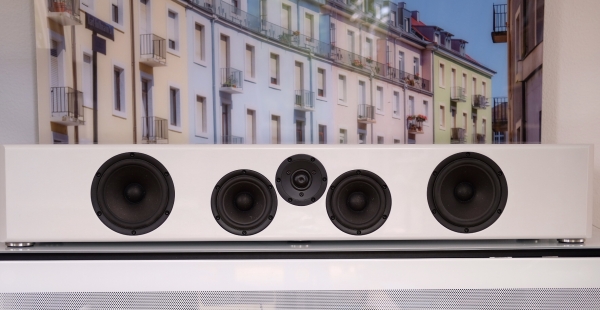
What are the output parameters of this speaker? Sure, there is the simulation of spatial playing, there are the familiar drivers of the Satorique 4 - not quite, the bass is shrunk to the 16 cm Satori. This is necessary so that the center retains its narrow silhouette and thus can present aesthetically to the eye and ear. This is how the Satorique Center was created, a three-way d'Appolito speaker in a slim design, where d'Appolito describes the driver arrangement and crossover layout.
The housing construction - a matrix that inspires
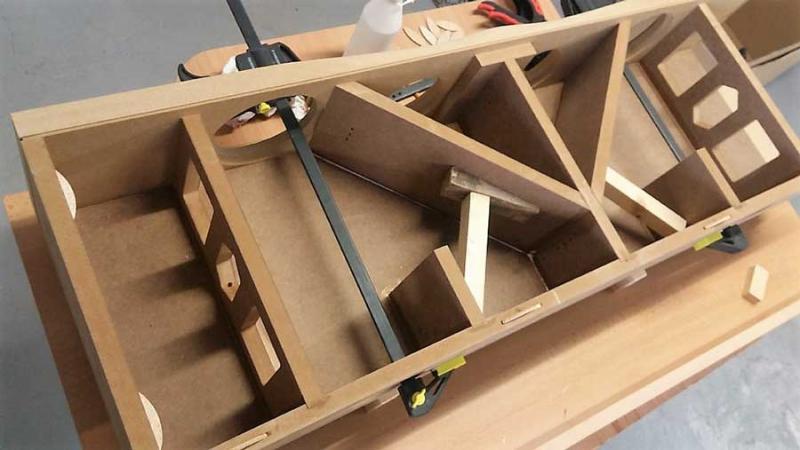
In addition to the design of the front, which is based on the family members Satorique 3 and Satorique 4 in design, a separate chamber is provided for each driver. So that the maximum potential of the drivers can be used, this design is advantageous here. There are always influences with several loudspeakers playing the same way, to be exact, at distance = lambda/2 - that is the distance between the diaphragms in the cabinet, and at the frequency at which the sound arrives at the other chassis in phase opposition, thus reducing the level (dent in the frequency response). The larger volumes of the bass reflex cabinets of the bass department are braced as usual and because the cabinet should also sound good or as acoustically dead as possible and not play along, it is additionally "weighted" or "de-droned" with Bitumex on the larger surfaces.
TIP: Enclosure kit with inner matrix and 3D baffle available in the store.
Of course, own designs taking into account the volumes in cabinet construction are just as feasible and, after all, also characterize our hobby.

Clever cabinet design against bass problems
The bass cabinets have received reflex tubes on axis to the woofers to the rear - that is, directed against the wall. This is ideal in this case. Experience has shown that many DIY builders worry about the bass reflex tube to the rear. There is the thesis that it plays louder in front, there is the thesis that it also plays totally evenly into the room to the side, and many more.
In fact, the wave theory says the following:
1.
Allegedly, the opening and the low frequency range is a point source, because the sound opening is much smaller than the wavelength, practically this is neither acoustically nor metrologically so, because so far every bass reflex tube has a directivity with. This directivity is a "must have" for party boxes, because totally fat, otherwise it sounds just laterally rather funny in the room. Directed to the rear and then two bass reflex openings further away from each other, such a bass reflex construction then plays very evenly against the wall.
2.
The second are standing waves in the tube, so tube diameter = lambda. This is not nice and not really avoidable, but directed to the rear less audible. And so it is clear, full against the wall is super and super adjustable. Adjustable is perhaps a bit too technical, but it captures the issue pretty well. Every room has a "bass" problem because the bass is audible in the room with different emphasis or unemphasis depending on the frequency and therefore for different wavelengths. Reverberant rooms are therefore described as "boomy" because individual notes of the bass resonate extremely long and others not at all. Home cinemas or living rooms, for which this speaker is intended, will hopefully not sound like this. These should be acoustically damped in the bass range with bass absorbers - as edge absorbers as in our listening room - or in the form of Helmholz resonators tuned to the room. This provides the basis for a multi-faceted bass. And of course, there are different preferences when it comes to bass intensity, which can be adjusted as desired by varying the center to the wall by a few centimeters. There is no ideal for this. Here, too, the tooth must be pulled if someone thinks music or movies were recorded "ideally". There is no such thing as an ideal recording, just as there is no such thing as an ideal listening room or an ideal distance from the wall. But there are nice sounding rooms with pleasant acoustics and there are nice playing loudspeakers that can convey a great listening experience.
As a little extra, the two woofers are "detuned" in the low bass. This means that BR tubes of different lengths are installed in the two chambers. This has a great acoustic effect, because the resonance of the two bass reflex enclosures are a few heart next to each other and so no "drone frequency" sets in. Practically, anyone can try to hear if they can perceive a difference in the low frequency between the right and left, but this is hardly likely, however, you can hear the difference between two tubes of the same length and two different copies, as the latter sounds perfectly balanced - just like the objective of this speaker or the whole line.
The midrange and tweeter sector of the cabinets is pure wave theory, i.e. simulation of the drivers to each other to create optimal dispersion at possible crossover frequencies. This is important so that the subtlety of the music and the uniformity of what is reproduced can be heard acoustically balanced at many locations in the room. Thus, the many details of loudspeaker design automatically result in a specific enclosure shape for the highest acoustic demands. Own design for a high individuality distinguishes loudspeaker self-construction. A simple cabinet design is possible for everyone: as long as the volume mass is kept, there are no limits to creativity.
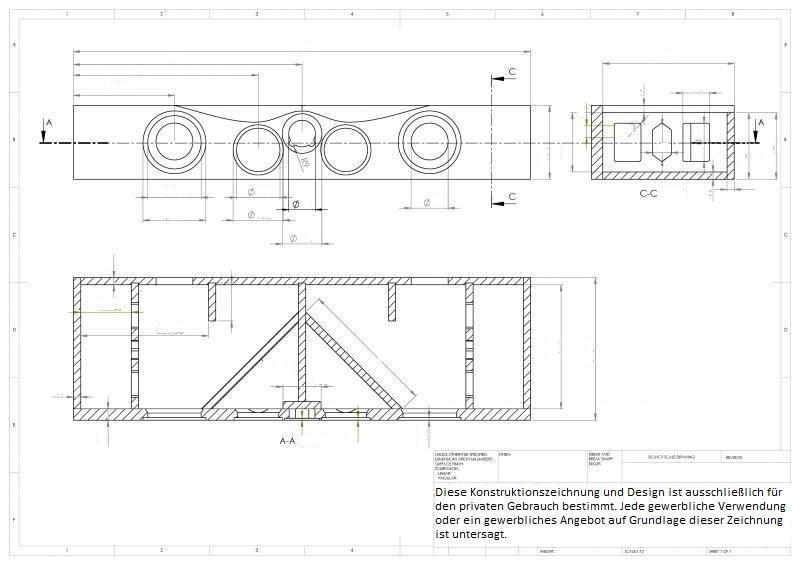
Flow resistance has nothing to do with mythology

Then there's a side issue where you can also do a lot to the sound: the damping.
For this, a white Sonofil mat is cut in half lengthwise and placed in front of the slanted partition of the midrange compartment. The rest is cut diagonally, so that you get 4 triangles, which come to the ceiling and the floor of the midrange chamber. In between, 2 layers of triangularly cut black Sonofil are to be installed, but with the condition that the fiber direction runs right-left and not from front to back. Now this is not mythology, but crude physics, since the flow resistance of the wool across the fiber direction is higher than in the longitudinal direction. Thus, damping across the grain is also more effective. The stack of Bondum800 and black Sonofil is a sandwich, so to speak, filling the entire midrange enclosure. Basically, directly behind the loudspeaker is rather less useful, but the sides are more likely to be filled with small scraps. Since the midrange chambers are so tiny, careful work here is synonymous with good sound. Behind each woofer, the compartment, which is bounded on the side by the bracing frame and on the other side by a board or the crossover on the wall to the midrange compartment, is filled. 1.5 mats of Sonofil are sufficient for this purpose.
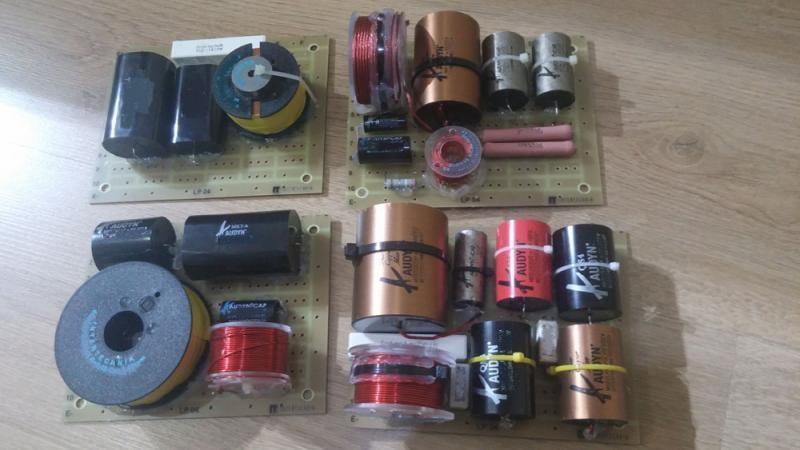
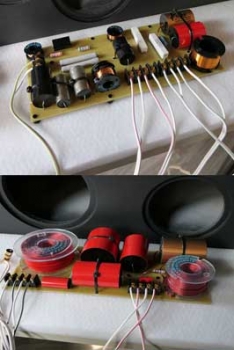
High-end crossover for everyone - Audyn Caps and Airtherm inductors made in Germany
For more than 40 years, Intertechnik has been manufacturing crossovers and high-quality components for the industry. From the sample crossover to the series as well as layout and the production of printed circuit boards. The professional design of the crossovers is just as much a part of this as the component arrangement. The smallest mistake can make a midrange sound like a voice from a shoebox.
Therefore, all 4 crossovers are fully assembled and supplied as a set with this speaker.
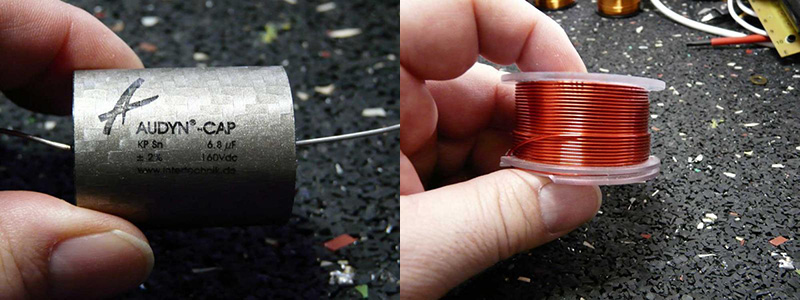
So, three ways and done. Yes, it sounds, the Satorique 4 demonstrates. And it is always a new tuning to find the perfect balance and playing pleasure of the speaker. Here the crossover is almost a two-way crossover with a dip in the midrange. With the two midrange drivers, this is filled cleanly and the directional characteristic of the speaker is perfected.
Then there is the next task: the optimal coils.
That's why the center speaker has an air core coil for the low frequency branch, which is a compromise between ohmic resistance and size. This works also because the center gets along with a lower inductance and the coil is therefore smaller. Microphonics of the crossover coils is not yet an issue with the low-frequency coil, on the one hand, this is heavy (poor mechanical excitation) and on the other hand, the capacitor of the crossover sucks the midrange (figuratively speaking). For the midrange there are therefore only Airtherm coils, which come close to the quality of a tape coil due to their caked windings. In the midrange and tweeter branch, as in the Satorique 4 tin foil capacitors and copper capacitors are used, because this makes the played treble of the midrange finer and more vivid. The tweeter branch in this combination lets the Satori tweeter become a sonic high-flyer. The subtlety, dynamics and liveliness of the sound reproduction break boundaries, tweeter signals virtually float in space.
Measurements
Free-field frequency response
The center's frequency response is tuned very linearly, even under 30 degrees upwards the frequency response can still be described as linear.
The horizontal lateral angles were measured at an angle of 10 degrees upwards to take into account the real listening conditions. Here, the in the base and midrange can be seen, the presence range plays nicely wide into the room via the bolides. Thus, voices are excellently locatable in the center and the sound separates from the speaker.
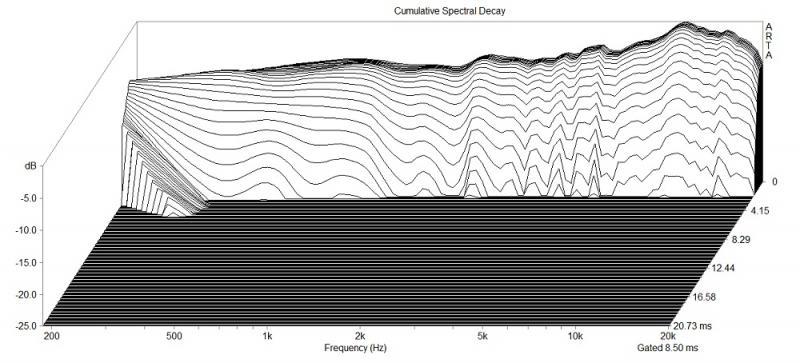
The waterfall diagram is, as with the other Satorique models, free of any influences and almost unreal ideal.
The distortion measurements also show the high level of the speaker. Here, too, all wishes are fulfilled.



Conclusion: Design and sound form a unity
The design of the center fits seamlessly into the design language of the Satorique family. Sound and design do not have to be at odds with each other. As the Satorique 4 has already demonstrated. The Satorique Center is another building block in the high-definition world, a kit speaker that, like the Satorique 3 and Satorique 4, combines precision, authenticity and naturalness. Here, our developer could show what he's got.
With the loudspeaker we are in the self-build technically at the highest level. The chassis quality and the quality of the components, such as the Audyn Copper Cap and Airtherm coils are otherwise only found in the upper class of finished speakers. The whole thing also remains update-proof for the future if you later want to switch to the Beryllium class, as currently confirmed by the press.
Whether you build the cabinet for your Satorique Center completely yourself or order a cabinet kit is up to you. You will get the support from us, so you can count on a professional result in any case.
I would think twice about building the center. Because what should come afterwards?
Maybe two more Satorique - one for right and one for left.
PS: Special thanks to Vlada, who actively supported us with his pictures of the construction.
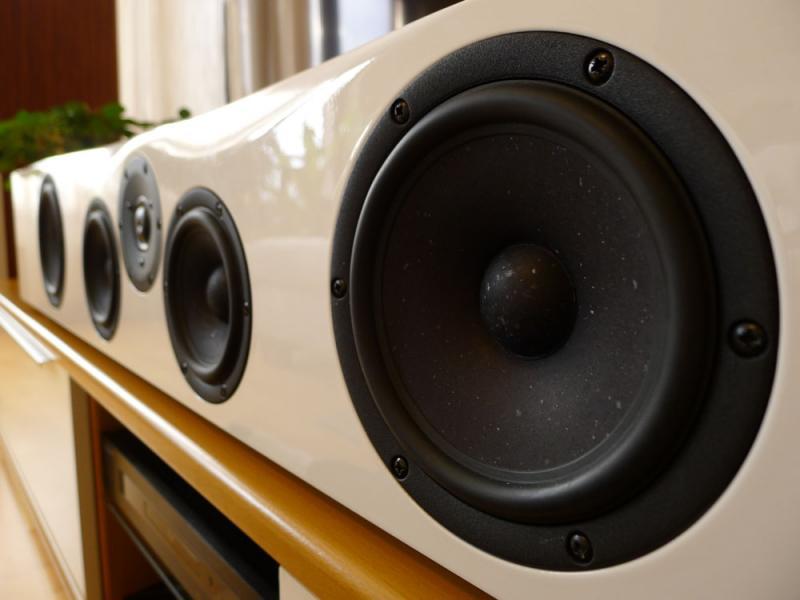
Satorique 4 Center perfection in every detail
Report from Mazaksklaus
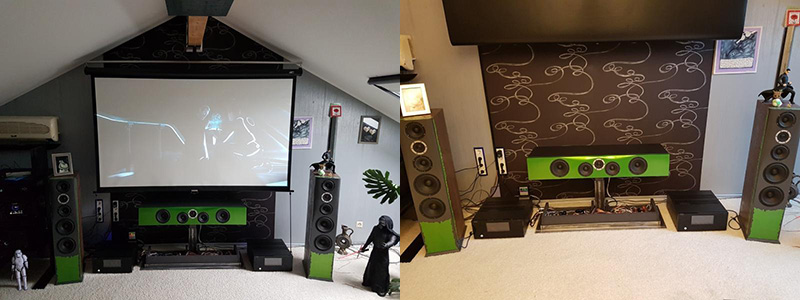
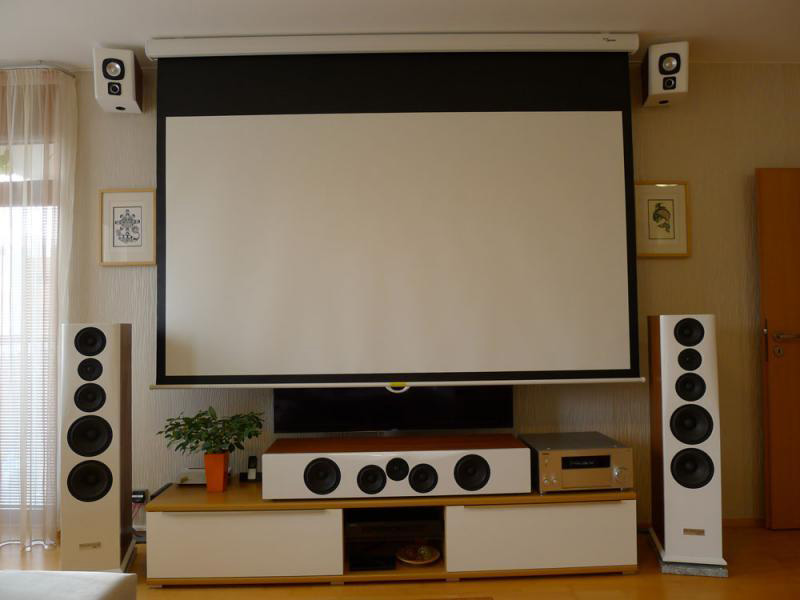
The Satorique 4 runs now quite a while with me in the home theater, and what can I say, these miserable S4 have me pretty spoiled!
Why? Because I can, if at all, only sau expensive and thus almost unattainable speakers inspire! Which of course doesn't matter to me, because I certainly won't need a new front for the next few years. Although of course you never know what Intertechnik in the next few years, still fantastic brings to light. If I am also of the opinion that it will be difficult to surpass the Satorique 4 series audibly.
Intertechnik has been quite slow in releasing the S4C! There was already talk of a release this time last year. After a seemingly endless wait, it was finally just before Christmas that the redeeming call came from Marcus that the S4C kit including case was ready to ship! FINALLY! Let's have it!
I had the kit delivered to my wife in the company for an easy package acceptance. On the predicted day of delivery, a picture arrived on my cell phone around noon showing a huge box on a pallet. My wife was completely frightened by the sight. She called me in near panic, "how am I supposed to get that into the car?" don't worry honey, open it up, it can't be full! Her colleagues asked what was in there! A refrigerator? No, a center speaker. Of course everything fit into the car without any problems! I would have liked to see the stupid faces of the colleagues nevertheless. :-D
By the way, the switches were not included, because poor Marcus could not keep up with the soldering due to the super "switch action". But that was no problem for me, because I had to finish the cabinet, the living room tiles and the wallpaper in the new building ;-) (yes I'm already building speakers again during the construction phase) (yes my wife is extremely tolerant).
After our living room was finally finished, I began full of anticipation with the cabinet construction, which should be due to the ready kit, not particularly complex or quickly done. Actually!
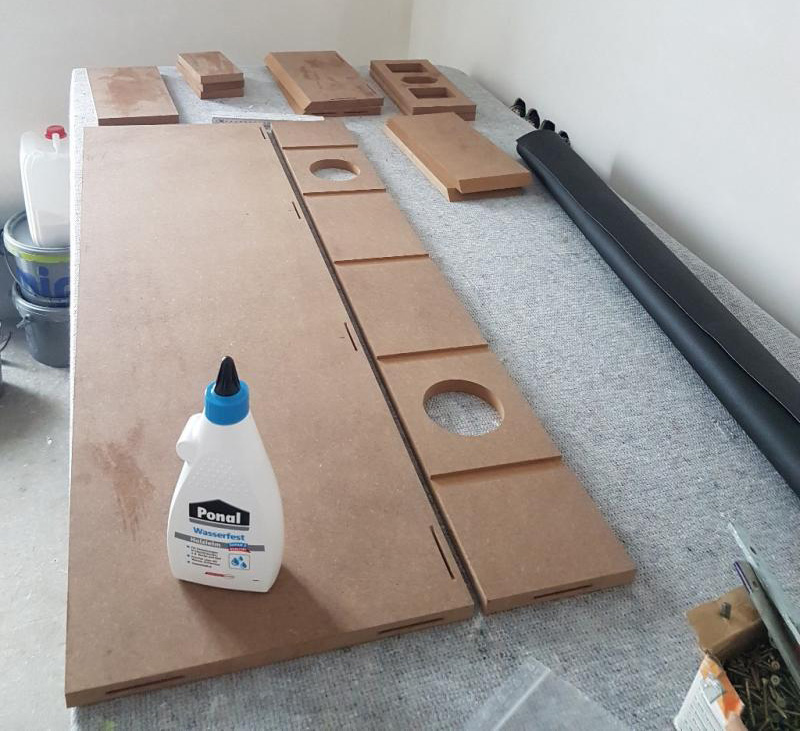
But it is so that the housing is very elaborate. That's why I was glad that I opted for the ready-made version. Surely you can build the housing "by hand" well itself, but that is already work, and for that you need time, do I have it in the amount available? Possibly when I am completely finished with the conversion of our dwelling, but at the moment not really! So the finished kit, as usual in the usual good quality. It's already the fifth case I'm assembling, even though the Micro AMT one was very small and I still owe Intertechnik a report on it, sorry it's taking so long.
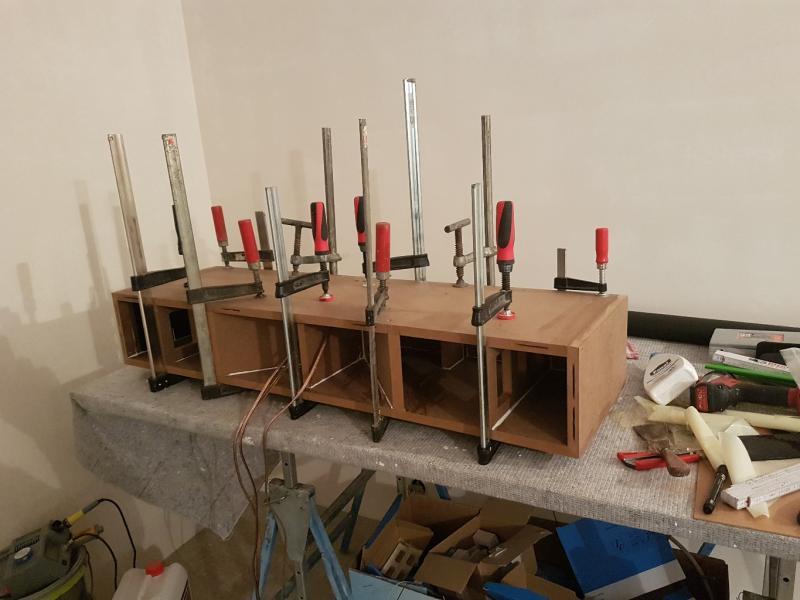
Since I am unfortunately not the most patient woodworker, I still have some screws, in addition to the Lammelos set, so I do not have to wait for the shit glue. Thank God I became a metal worker! I pre-drilled the screw holes and countersunk them well so that nothing cracks and the heads disappear, so they are flush. The hollows themselves I have roughly spatula! Why roughly? First, I sanded the whole case with the random orbital sander and since the intended finish, well forgives mistakes, small imperfections do not stand out but more on that later. The housing was glued in record time, I think I have not even needed 2 hours without baffle. Actually, I would have installed the switches immediately during assembly, but first I did not have them yet, which was not the problem, but here I had something special in mind, also more about this later. The insulation I installed immediately before the baffle came on it, because that is much easier. This was also done quickly! It was also not as difficult as I thought after first studying the instructions. It's amazing what all plays a role in the development of a loudspeaker. I can not imagine that with the chipboard boxes from the large electronics stores, someone has thought about in which fiber direction the insulation is installed! Sanded I have the case, by the way, before installing the insulation since this would otherwise logically completely messed up!
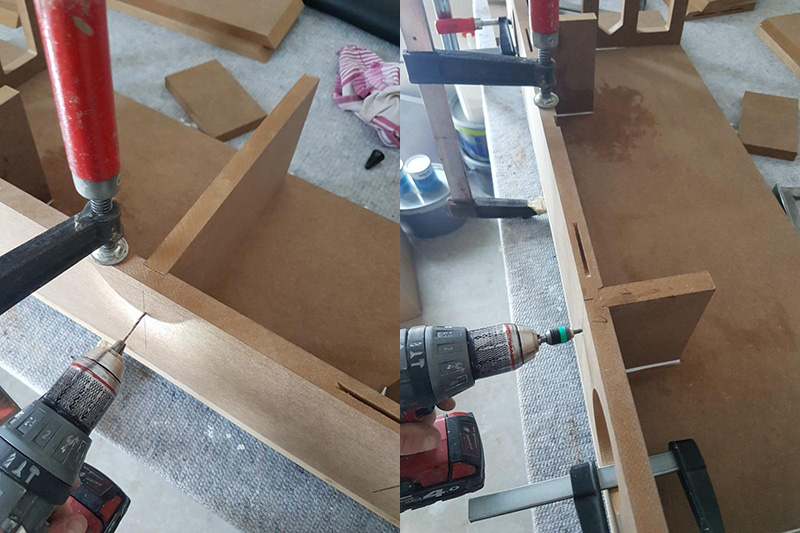
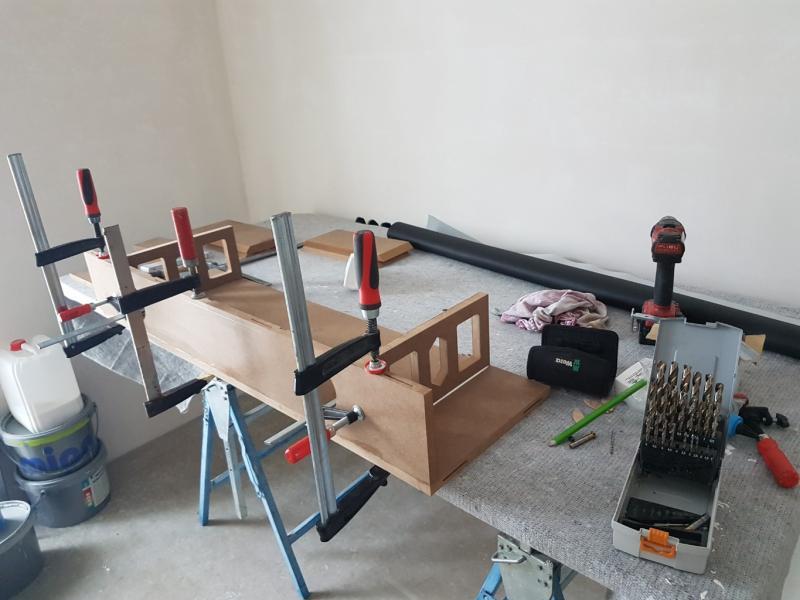
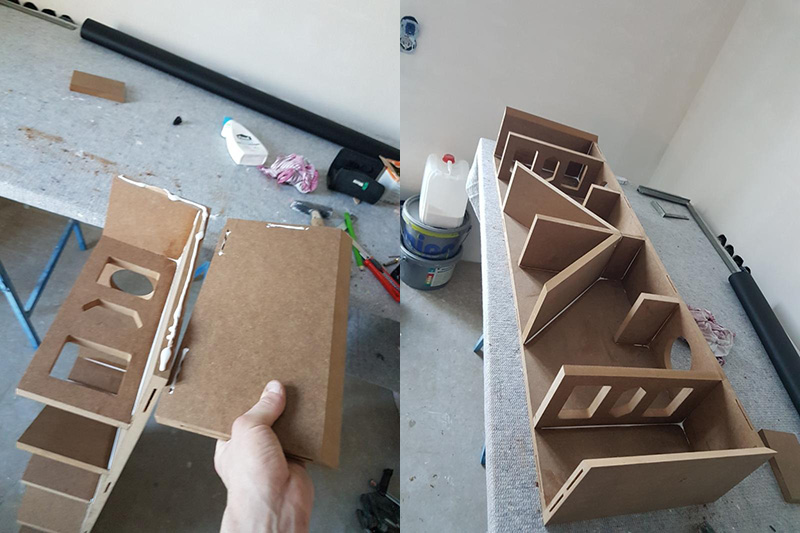
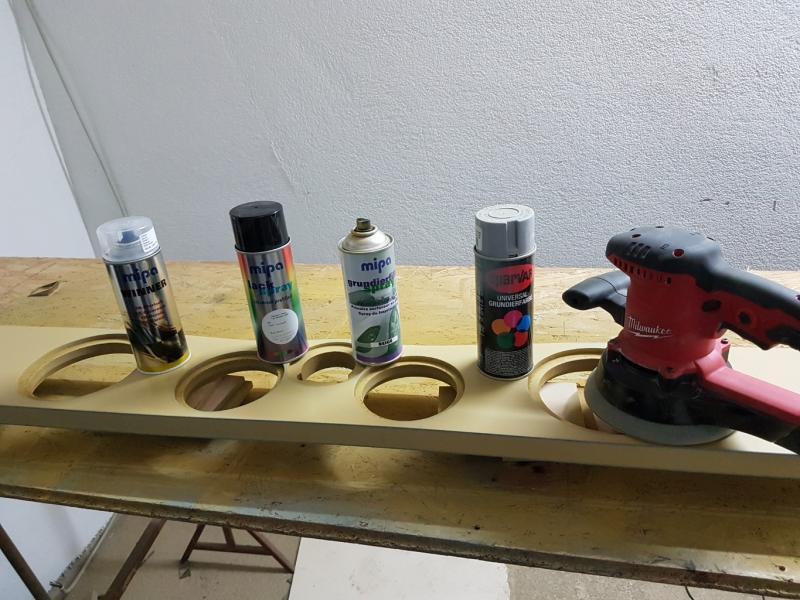
The baffle I painted again and again in between, so that the individual layers have enough time to dry! I think I have painted almost a whole week on it. First I bombed a whole can of primer on it, then sanded everything, first by hand (too tedious for me ;-) ) then with the random orbital sander. Here I am really very satisfied with the big Milwaukee, because here not only the speed but also the oscillating circuit is on or adjustable! Who is looking for really good and reliable power tools or battery machines is well served here, I now own a whole fleet of Milwaukee machines that are e.g. Hilti in nothing inferior. After the primed surface was now nice and smooth, I also brought a whole can of filler on it. Only on the baffle! Then I sanded everything clean, this time also the last gear by hand! From the result I was quite convinced, not perfect but "mir satt gut". So, a can of metallic green car paint and a can of clear coat on it. Then still some polish behind it and good.
Now we continued with the housing...
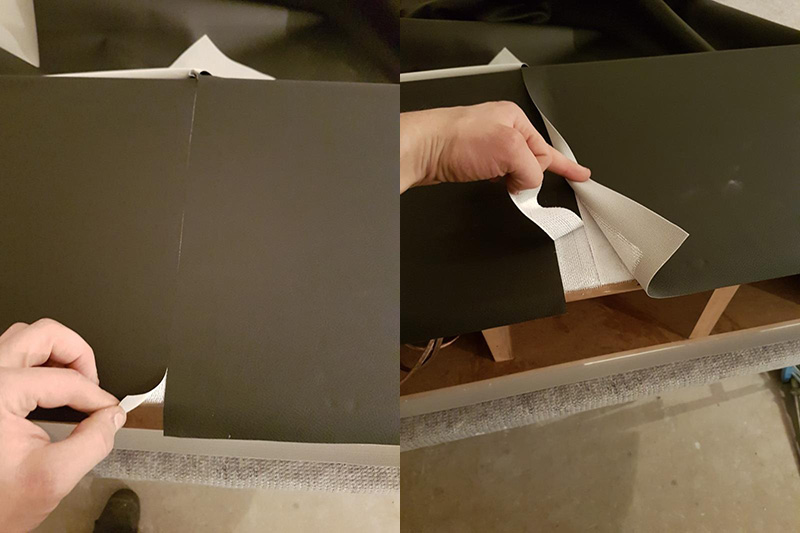
For once, I wanted to do something not quite everyday, and decided to cover the center with imitation leather! This has three advantages. First, it does not reflect so (in the home theater with beamer not to be neglected!) Secondly, it goes quickly ;-) and thirdly, you do not have to pre-treat the housing so minutely! And not to forget it is really cheap! And looks good! And it is easy to maintain! You can see the advantages are hard to beat. So I drove to Tedox and bought the leatherette for 8Euro the meter so 1mX1,5m, which is very thin which was absolutely advantageous for me!
To attach the leather to the case, I spread the leather out on the table and aligned the case. Then I took normal assembly glue and drew a few lines on the MDF, and with a very fine notched trowel evenly!!!! and then placed the case on the leather at the previously marked points, pulled everything tight and smoothed it out. Then I smeared the other sides full of glue, and pulled the artificial cow around the first four sides.
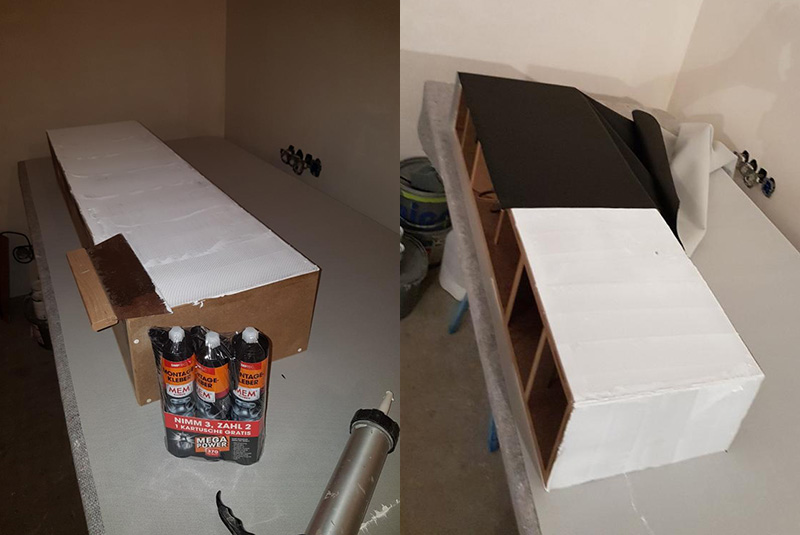
At the bottom then fixed with a few staples (later not visible). I let that dry for now, and glued the back later the following day. The most difficult part was the area where the baffle is inserted. Here the leather must with drum so that the milled "shadow gap" later looks clean! But it must not protrude too far into the glue edge, so that there is still enough support for the front panel. So I left the leather about 6-7 mm into the edge and then cut it cleanly! Therefore, it is also very important that the material is as thin as possible.
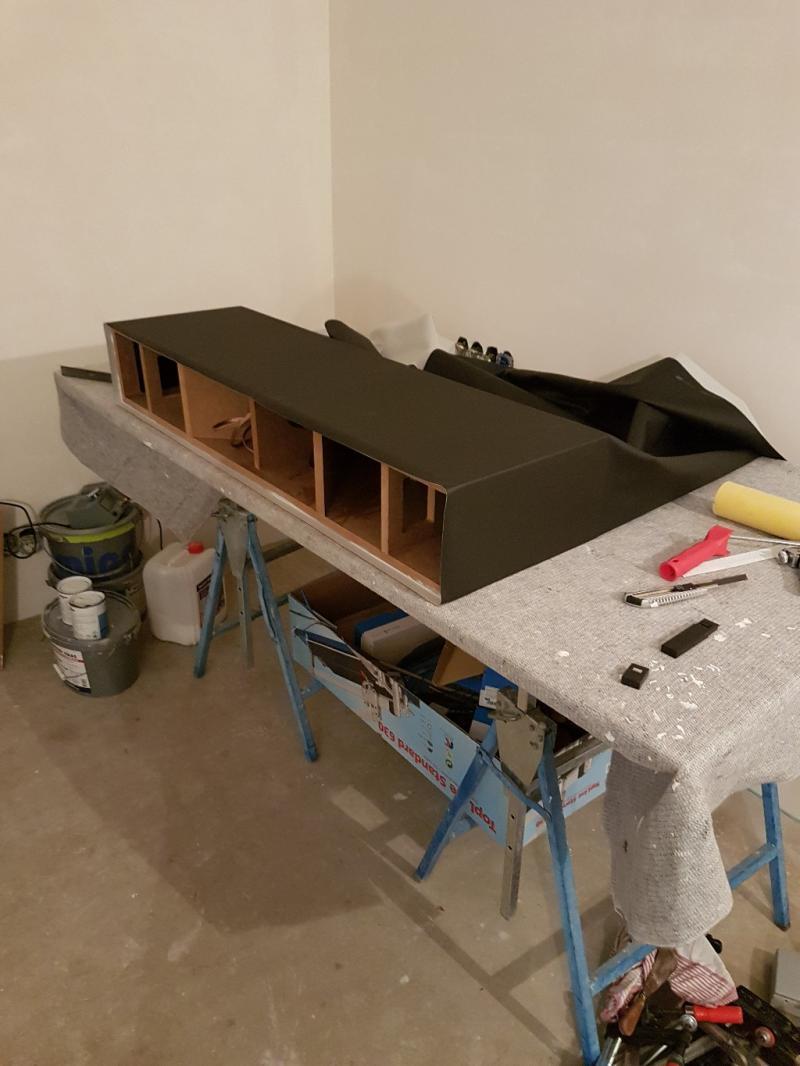
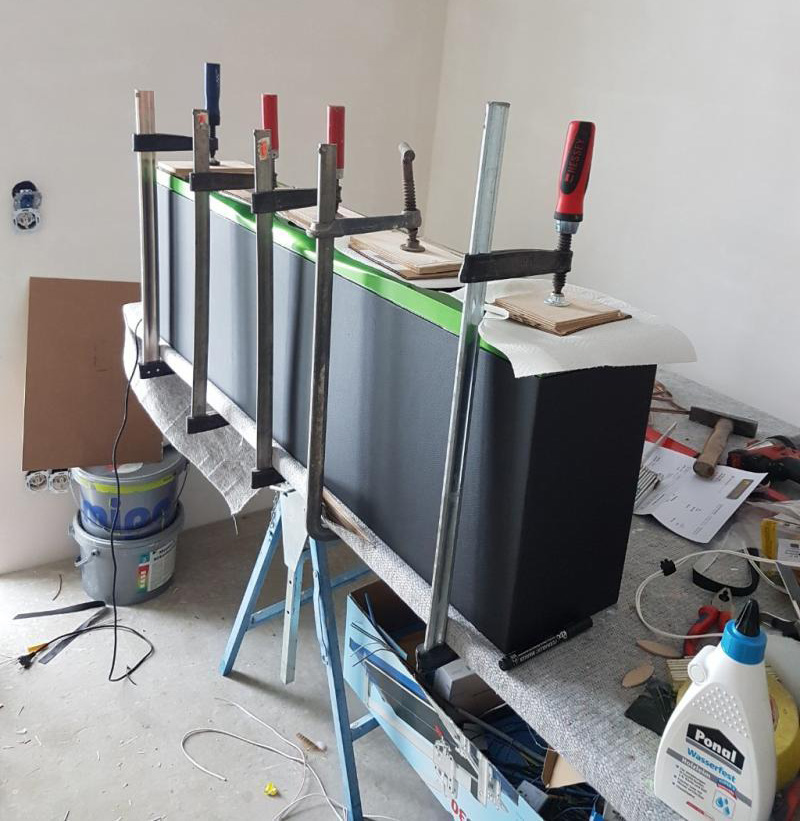
Now I have again ensured that all supply lines for the chassis are in their place (for this AT ALL TIMES, DRILL ALL HOLES DIRECTLY BEFORE ASSEMBLY OF THE HOUSE) and put on the baffle! For this I used as always D3 glue from Ponal, and everything well braced!
The chassis are quickly inserted. Here it is also advantageous to pre-drill the screw holes!
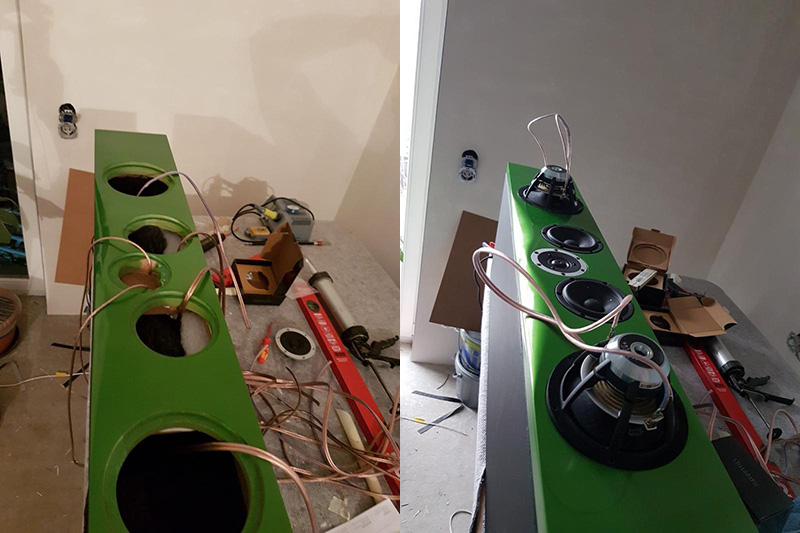
Now to the crossover
In the meantime, the Intertechnik Christmas Coffee was just around the corner. I was doubly looking forward to it, because I had agreed with Marcus that I would get the finished turnouts right away! On site, Marcus and I then briefly discussed everything like what belongs together. Afterwards, I was quite happy that I did not have to solder myself, because this has nothing to do with simple! By the way, it was a really great afternoon or evening.
I decided to place the switch externally! This has two reasons, no three!
1. I have saved myself the fiddling in the housing.
2. if something is, one comes super simply to it.
3. if times an interested person is to visit one can look at the whole times more exactly.
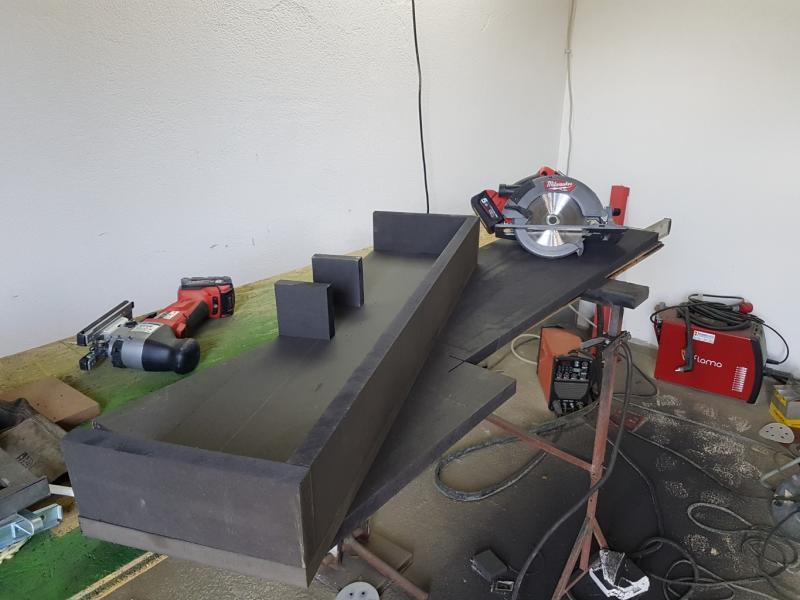
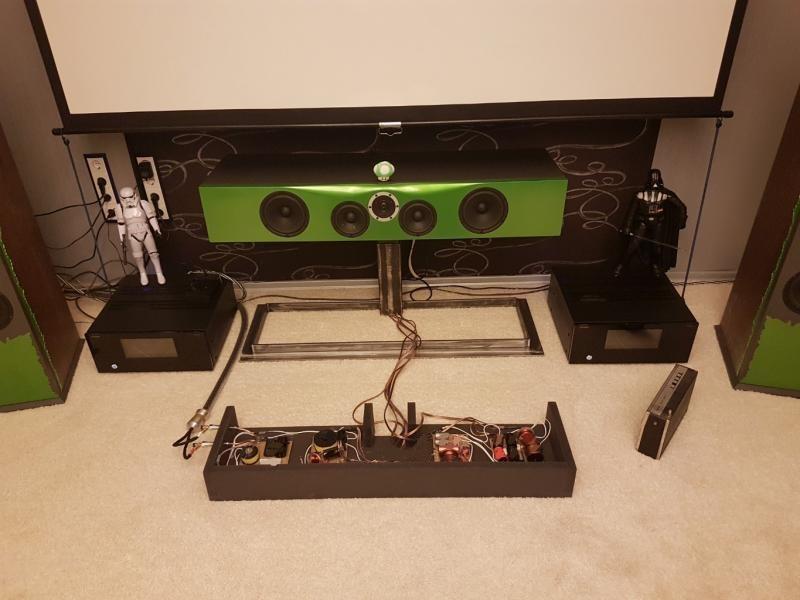
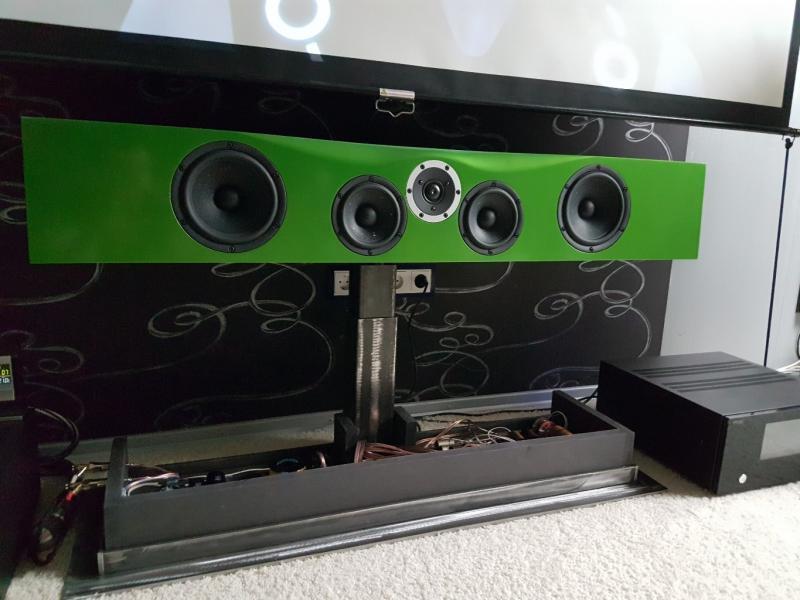
Since I want to place the center under the screen, I still needed a base, in which I then also accommodate the crossover. The base will of course, how could it be otherwise, FROM STEEL! Thank God I'm done with the wood crap! I had the base ready in a few hours. Of course, I could weld it and not glue it. It is height adjustable and you can tilt it. So I am also future-proof on the road and it should actually be possible to always align the center optimally!
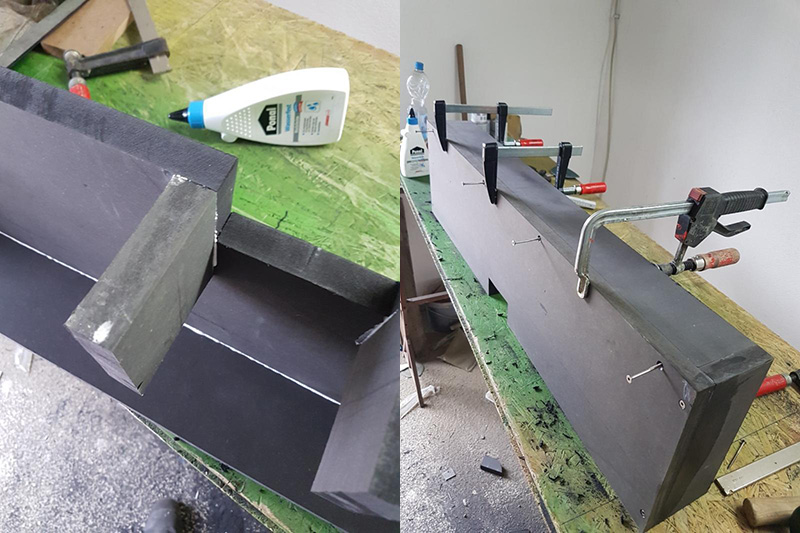
But not quite done with the wood stuff, I had to build the box for the turnout.
I quickly built the switch box from black through-dyed MDF that I still had. The box fits right into the base, making for a sleek overall look! Black MDF with the hand circular saw, by the way, one should better not cut in the workshop, which looks afterwards namely as if the chimney had exploded! The supply lines for the chassis are led through the adjustable tube and soldered to the crossover.
And now the drop is sucked!
Audio experience
I will not write much about the listening experience, except that he thrilled me from the first second! Absolutely thrilled!
Hearing impressions to describe is somewhere anyway nonsense, because exclusively, the OWN TASTE is decisive!
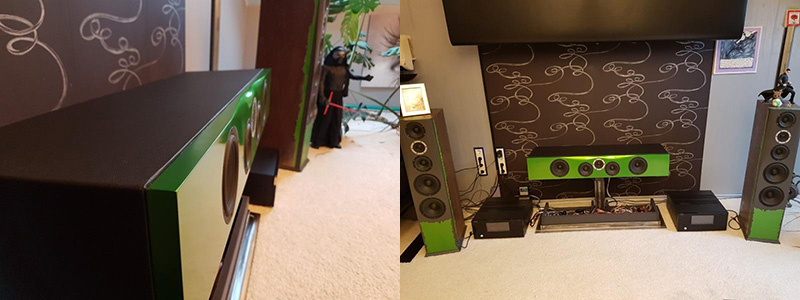
The S4C fits anyhow in my opinion, perfectly to the S4 and my front will be finished for the next years first! And ready in the home theater area means already what.
Thanks Satorique
Thanks Marcus
Thanks for reading
Satorique S4 Center - more perfection
Report from Vlada
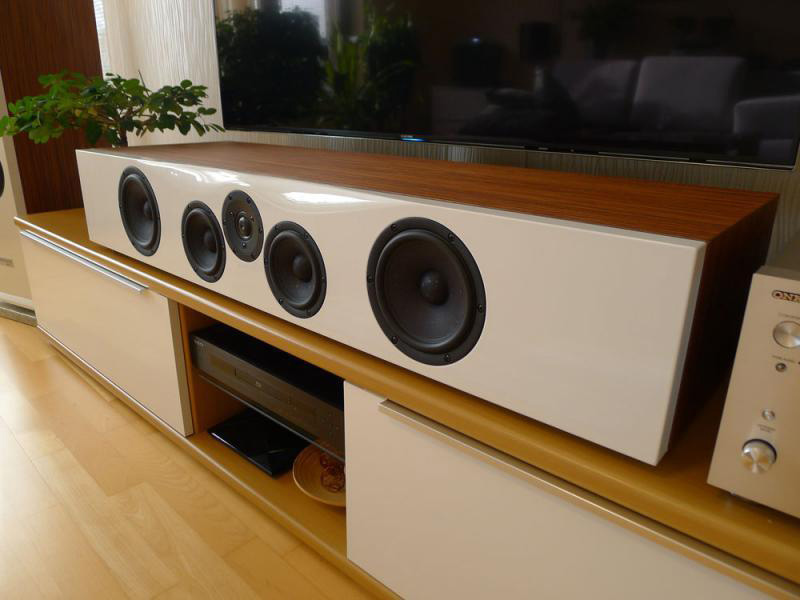
This time I wanted to replace my old Seas Center with something of higher quality. And again, I have the Satorique4, so what should it be. A lying Satorique4 would be good. So I was all the happier when Marcus from Intertechnik wrote to me at the beginning of the year "The Center ala S4 is being developed, wait and see". Well and in autumn it was so far. Finally, the wait was terrible....
So I'll probably repeat myself, but the beginning of my build reports is always the same. Once a big box arrived and it was full of for us hobbyists nice toys like spools, felt mats, chassis, etc. Just Christmas in November. Inside were also all the wooden parts you need to build. A complete kit, you just do not need to buy anything else, everything included, exactly Intertechnik quality. The cutting was done on a CNC machine, so everything fits with micrometer precision. You just need a good glue (I like Ponal D3), some carpenter's staples and you can have a complete box in an hour. The lamellos help a lot with the assembly, everything fits perfectly.


The bottom, back and front sides were done in gloss white. I use polyurethane paints, they show greater surface hardness and thus are more immune to scratches.
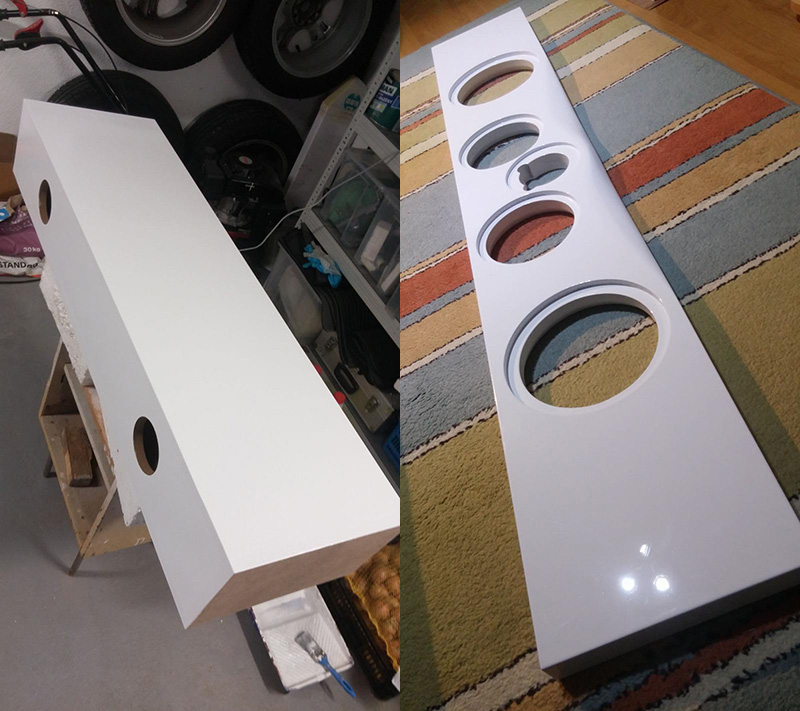
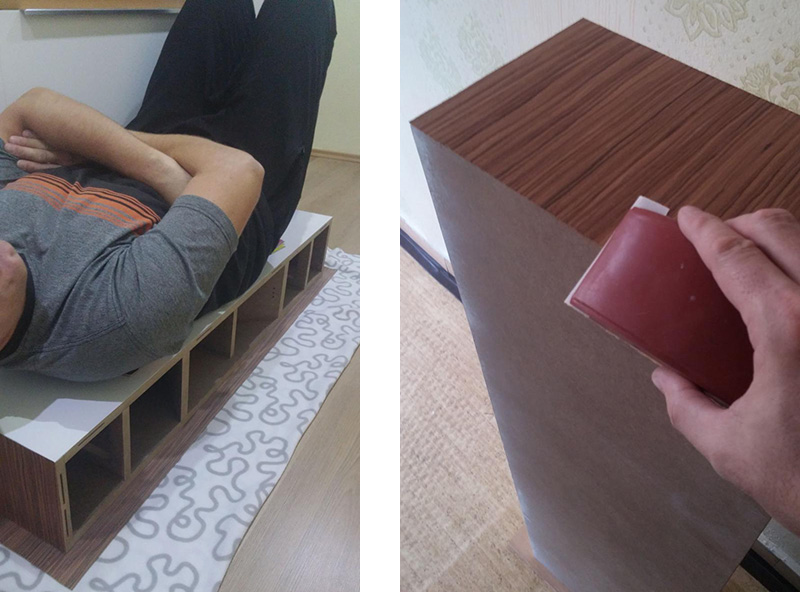
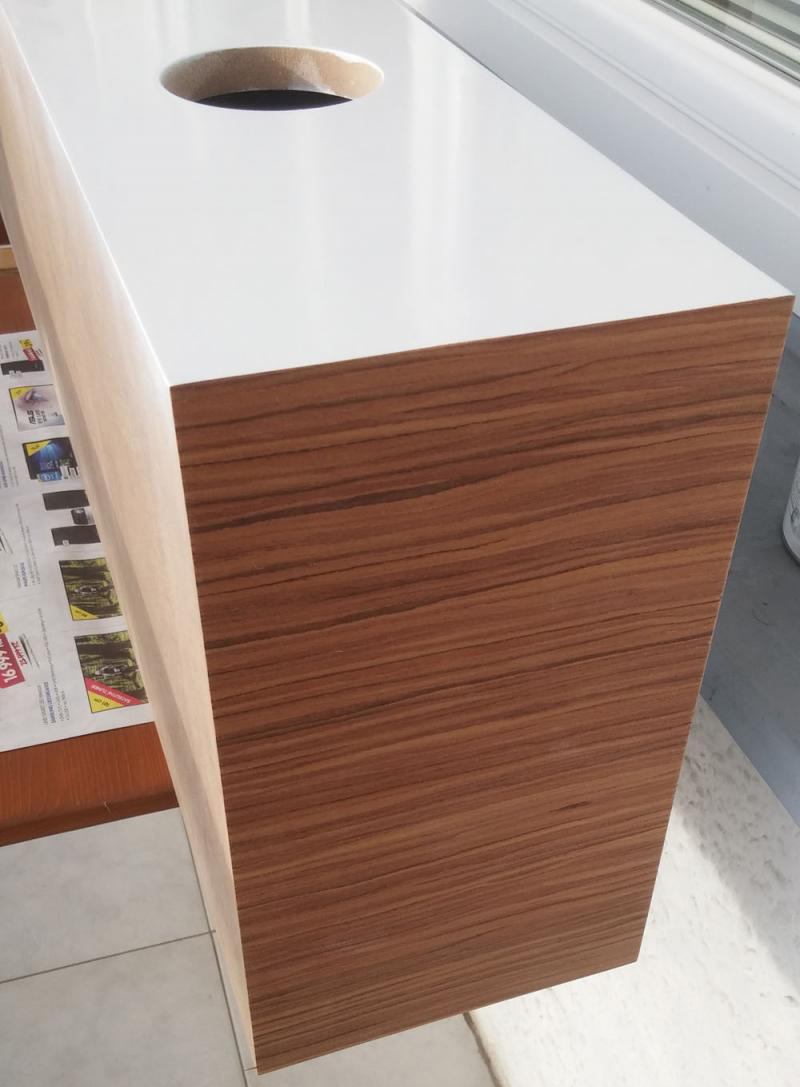
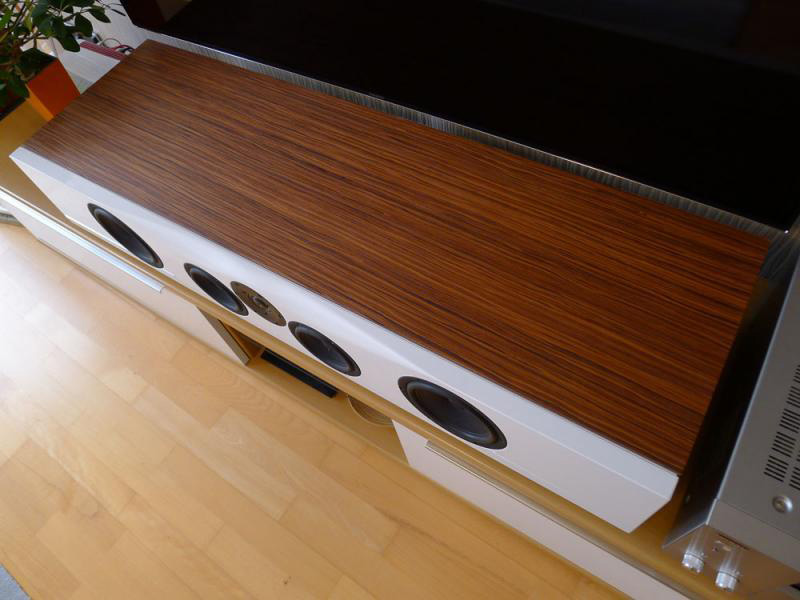
To make everything match in color, the sides and top are veneered with rosewood. It's very simple, almost like working with adhesive wallpaper. Spray both sides with glue, wait a while, put them together and press. I served as a weight. After cutting off the remains had to sand the transition edges with precision.
Because this box calls 5 drivers to work (just like Satorique 4 floorstander), the crossover must also be correspondingly complex. And with the limited space in the box, the crossover had to be built on 4 plates. No problem, for those who can handle a piston, it's pure joy. If you have no experience with soldering, you can have a crossover building service from Intertechnik. The top model with SB Acoustics chassis deserves the highest quality parts, such as capacitors made of copper or tin. Simply top class.
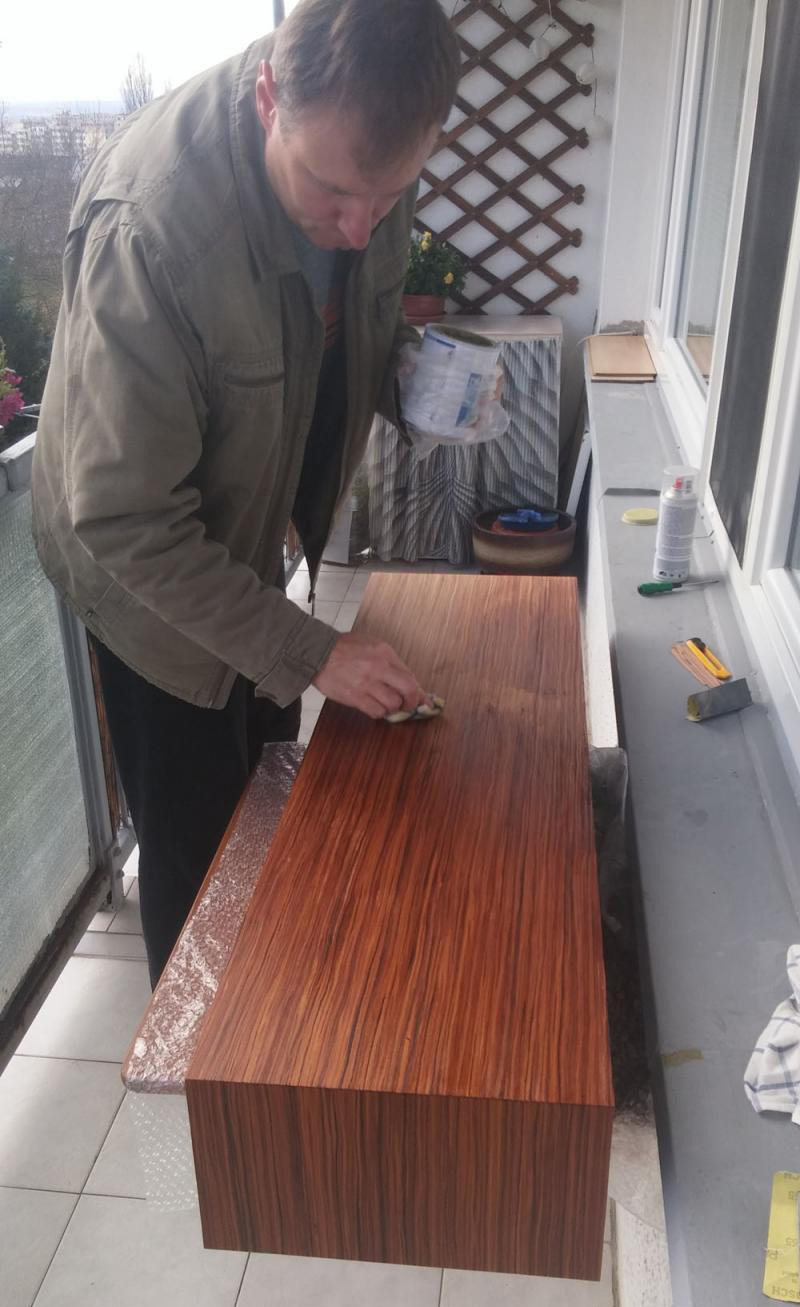
The veneered walls are treated with hard wax oil. I recommend OSMO or Remmers products. First coat, let dry enough, sand gently, second coat, sand again and final coat. Until the surface feels quite smooth.
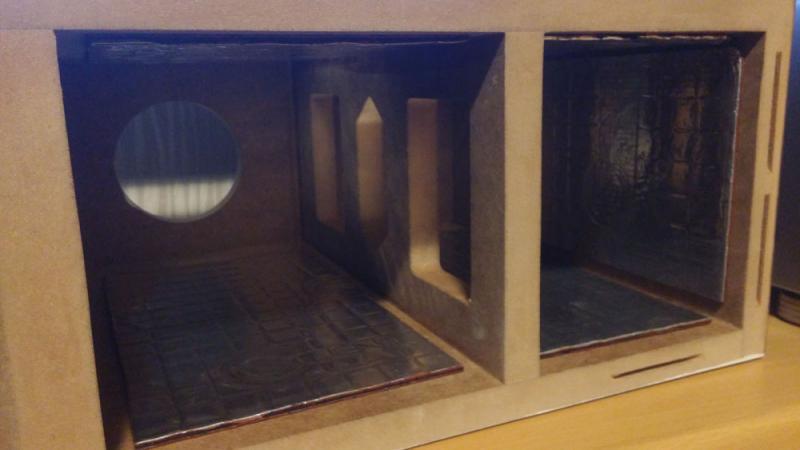
Although the walls were made of 20mm MDF and the front even 32mm MDF, the inner surfaces should be lined with bitumen boards, which eliminates the vibrations even more. I chose a three-layer version with aluminum, of course totally exaggerated, but you always want to have the best. At Intertechnik there are plates (with the same effect) very cheap.
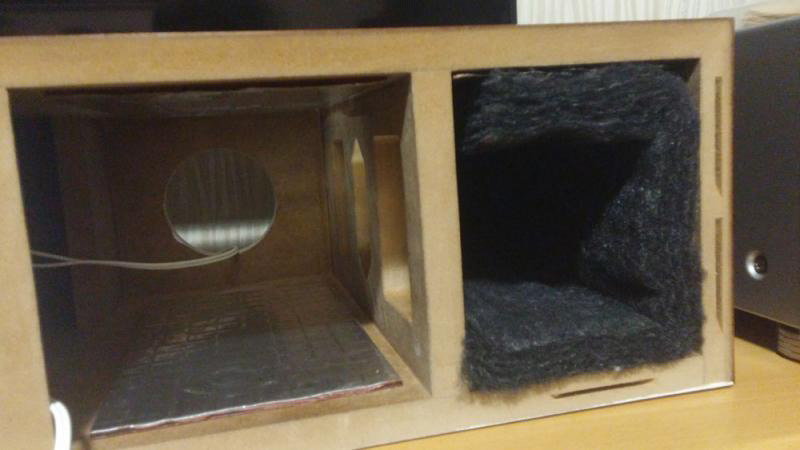
The chambers on the sides were filled with a mat of Sonofil. The same was done in the area where each two boards with crossover were attached.
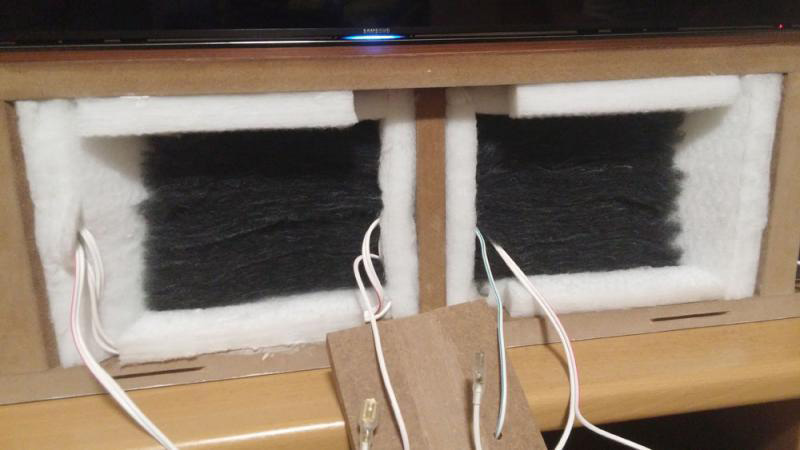
The middle chamber, where both mid-toners and the tweeter find their place, was covered with white Bondum 800 on the walls. The inner space is filled with black Sonofil in layers.
I glued the front to the rest of the box very easily and accurately thanks to the lamellos. Ready.
Driver assembly

The drivers are mounted with FastOn connectors because of possible disassembly. Ready is the magic child.
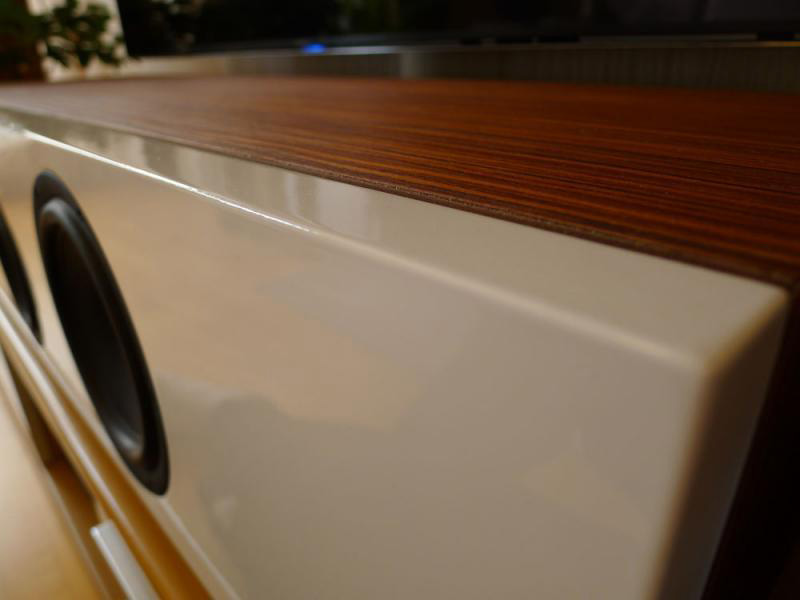
The view from above shows in full force the beautiful texture of rosewood.
My conclusion
So how does the Satorique 4 Center sound? Those who don't know how difficult it is to realize a d'Appolito design in a center speaker might say that it's easy to copy the crossover from a floorstanding speaker and that's it. Well, unfortunately it's not that simple. The dispersion characteristics of the "lying" d'Appolito construction are quite difficult to keep under control. From the center not only a small sweet spot is supplied (as with a floorstanding speaker), but a whole series of sweat spots in the form of a couch on which several people are sitting.
Testing a center speaker is a hard thing to do, you have to get rid of the stereo base, so the stage is limited to one source point. The best way is to close your eyes and let a speaker from the radio play on the center. I did it that way and of course you can hear a difference. Mainly in the mids and highs. The voice is clearer. Just like Satori. But you can get that with an ordinary Satori based box. That's why you don't have to have such a big box.
So what does the lying Satorique4 actually bring in contrast to the other centers? With the others there is always a feeling that the voice is interpreted. The voice in 5 channel sound comes from the center. But nothing more. You can always determine the direction from which the voice comes. Just with closed eyes.
But the Satorique 4 Center creates a whole new scene, completely filling the space between the floor to ceiling floorstanding speakers. It makes not just a point, but a whole area from which the sound comes. And it does it with equal skill and grace as the regular large floorstanding speaker. No limited frequency response or weak bass interpretation. The test sample with SACD from Mark Knopfler, or the one from Stockfish Records showed how unobtrusively and evenly the center plays. There is no Mark singing shrunken in a box, but standing Mark in life size.
For me it was actually no big surprise, I know something like that from the big sisters, it was actually only a completion of my existing "equipment". It would be a nonsense to buy a Fiat when you already have Porsche in the garage, right?
Greetings from Prague
Vlada
